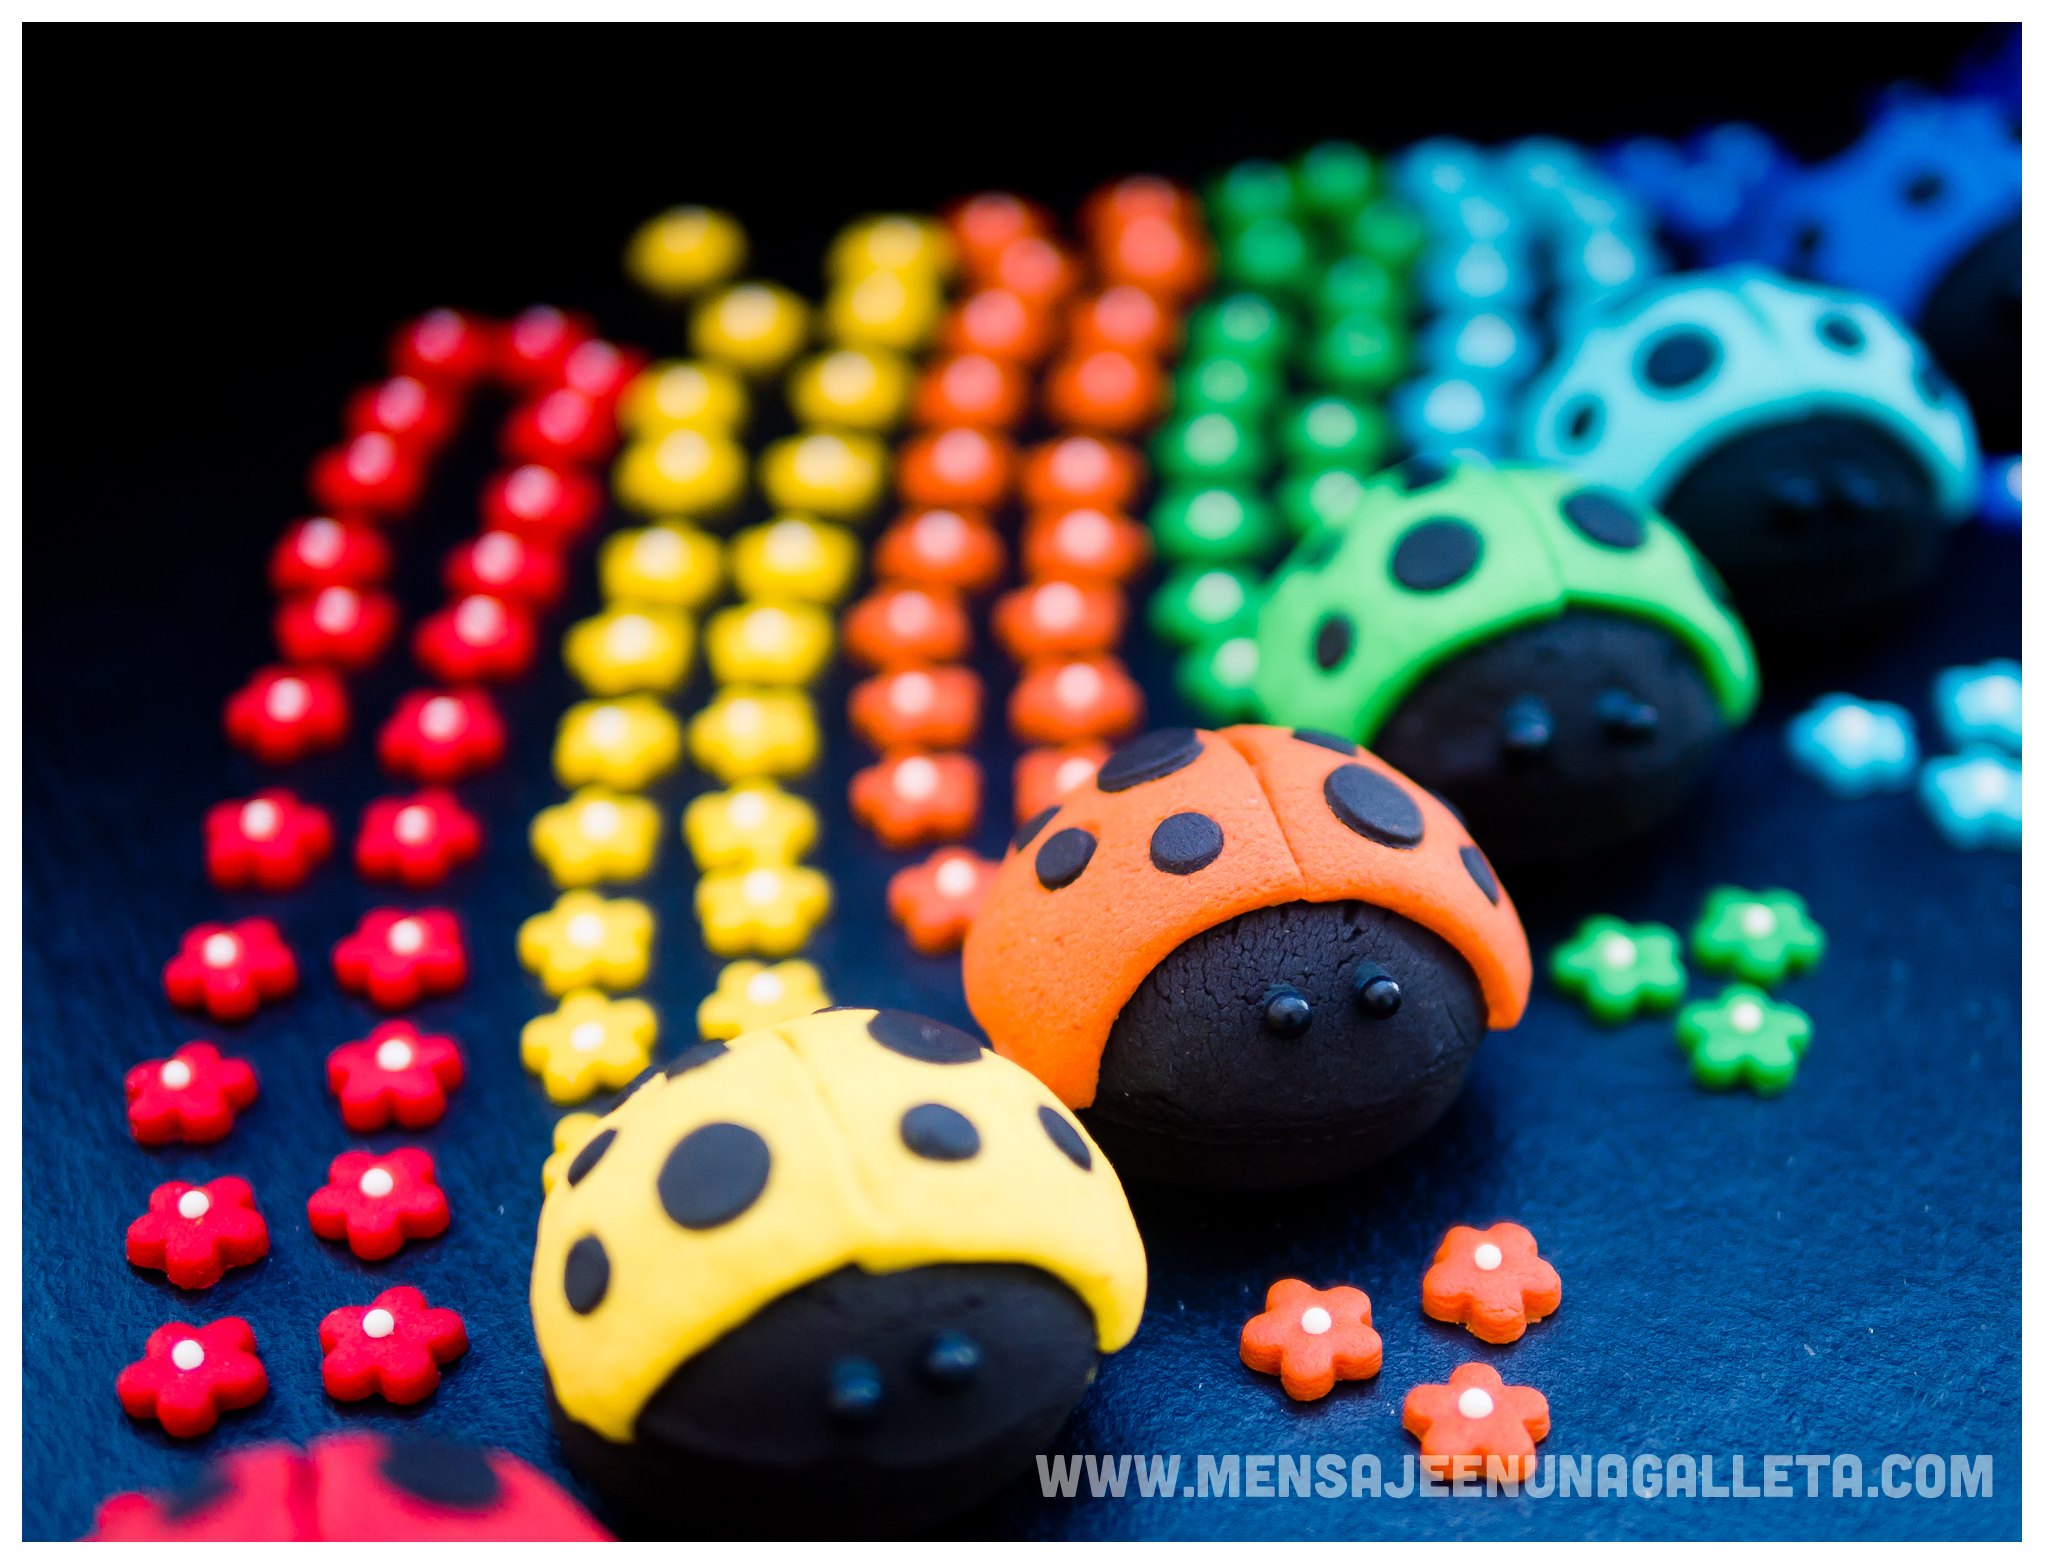
Para hacer las mariquitas que aparecen en el vídeo necesitamos armarnos de paciencia y además:
-Masa de chocolate
-Masa de mantequilla
– Bolitas negras para los ojos (Y unas gotitas de glasa negra para pegarlos)
-Unas gotitas de glasa blanca para el centro de las flores
Empezamos por la recta de mantequilla, esta vez con sabor a coco. Hace tiempo que no lo decía, se tarda exactamente lo mismo en preparar una receta despacio que deprisa. Pero si lo hacemos deprisa manchamos más y nos sale peor. Yo siempre pongo todos los ingredientes en cuencos antes de comenzar, parece a priori que da más trabajo, pero lo ahorra. Y sobre todo evita errores.
– 100 gramos de azúcar glas
– 50 gramos de sirope claro de maíz, si no tenemos lo sustituimos por otros 50 gramos de azúcar, pero el sirope aporta elasticidad a la masa. Y creedme cuando os digo que nos vendrá bien.
– 225 gramos de mantequilla a temperatura ambiente.
– 1 huevo pequeño, ecológico o de corral. (Nosotras siempre usamos huevos cuya numeración empieza por cero o por uno)
– Una cucharadita de sal.
– 400 gramos de harina.
– Una cucharadita de aroma de coco. El coco y el chocolate combinan a la perfección. Podéis elegir cualquier otro aroma transparente que os guste o simplemente no usar ninguno.
– Colorantes alimentarios. Esta vez he utilizado colorantes en polvo modecor Y estoy encantada, al ser en polvo no cambian la textura de la masa, pero lo mejor es que no le dan ningún sabor. Esta semana pienso hacer un pedido a HelloCakes.es y agenciarme media tonelada de cada.
Batimos un poco la mantequilla, el azúcar, la sal, sólo para mezclar los ingredientes sin añadirles aire. A continuación añadimos el sirope de maíz, el huevo, el aroma y volvemos a mezclar. Cuando tenemos una especie de crema de textura uniforme, añadimos la harina en dos o tres veces. Amasamos y dejamos reposar.
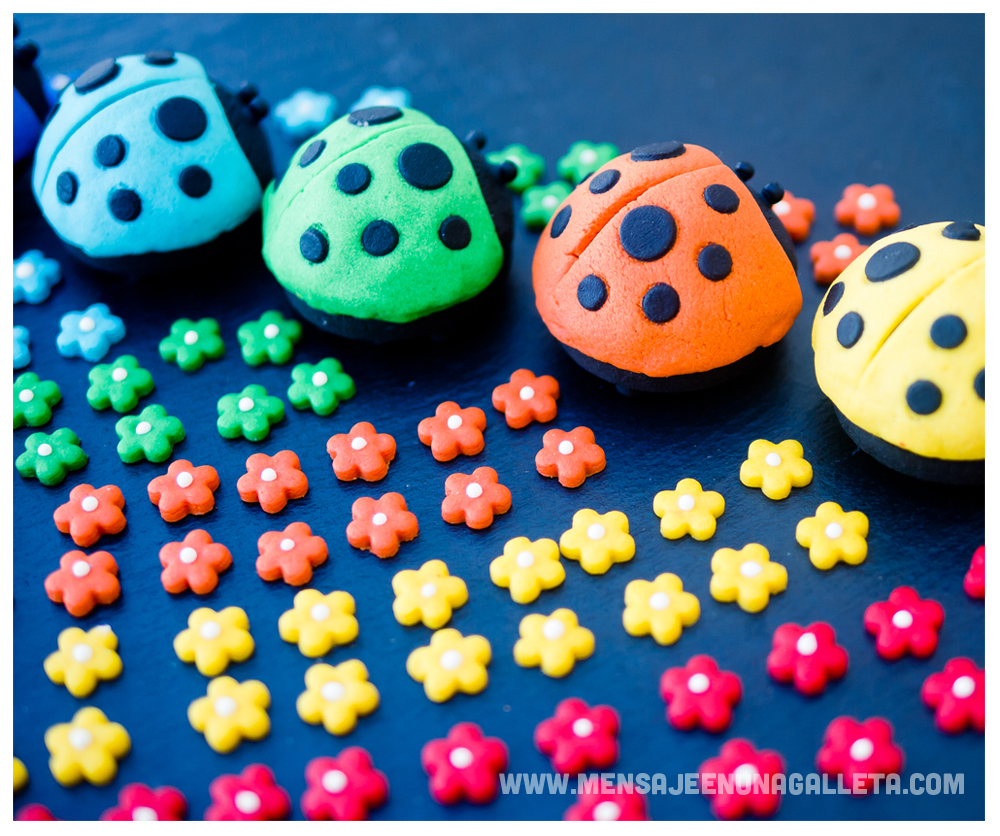
El último paso es teñir la masa del color que queramos hacer las mariquitas. Yo usé siete diferentes con la intención de formar un arco iris, pero intercambié las posiciones del amarillo y del naranja. Cuando quise darme cuenta ya se las habían comido.
Para la receta de chocolate los ingredientes son:
– 100 gramos de azúcar glas.
– 50 gramos de sirope claro de maíz, si no tenemos lo sustituimos por otros 50 gramos de azúcar.
– 125 gramos de mantequilla a temperatura ambiente.
– 1 huevo pequeño, ecológico o de corral.
– Una cucharadita de sal.
– 50 gramos de cacao puro en polvo Valor
– 230 gramos de harina
– Una cucharada de aroma de vainilla.
– Colorante alimentario negro.
Batimos la mantequilla ligeramente, le añadimos el azúcar, después el sirope de maíz, el cacao Valor, la sal, el huevo, el colorante y por último la harina en dos veces. Cada vez que añadimos uno de los ingredientes batimos para que se integre.
Tenemos listas nuestras dos masas. Ahora vamos a ver las herramientas que necesitamos. No son muchas ni muy raras.
– Mi super rodillo Joseph&Joseph nuevo y reluciente, cortesía de Mummy Crafts.
– Molde de silicona con cavidades semiesféricas.
– Tres cortadores de galletas redondos de tamaño decreciente, el más pequeño de los tres tiene que tener un diámetro similar al de las semiesferas.
– Dos cortadores redondos muy pequeñitos. (Sí, de fondant, pero ya sabéis cual es mi teoría, no existen cortadores de fondant, sólo cortadores para galletas pequeñas)
– Un cortador pequeño de flor.
– Un cortador cuadrado grande.
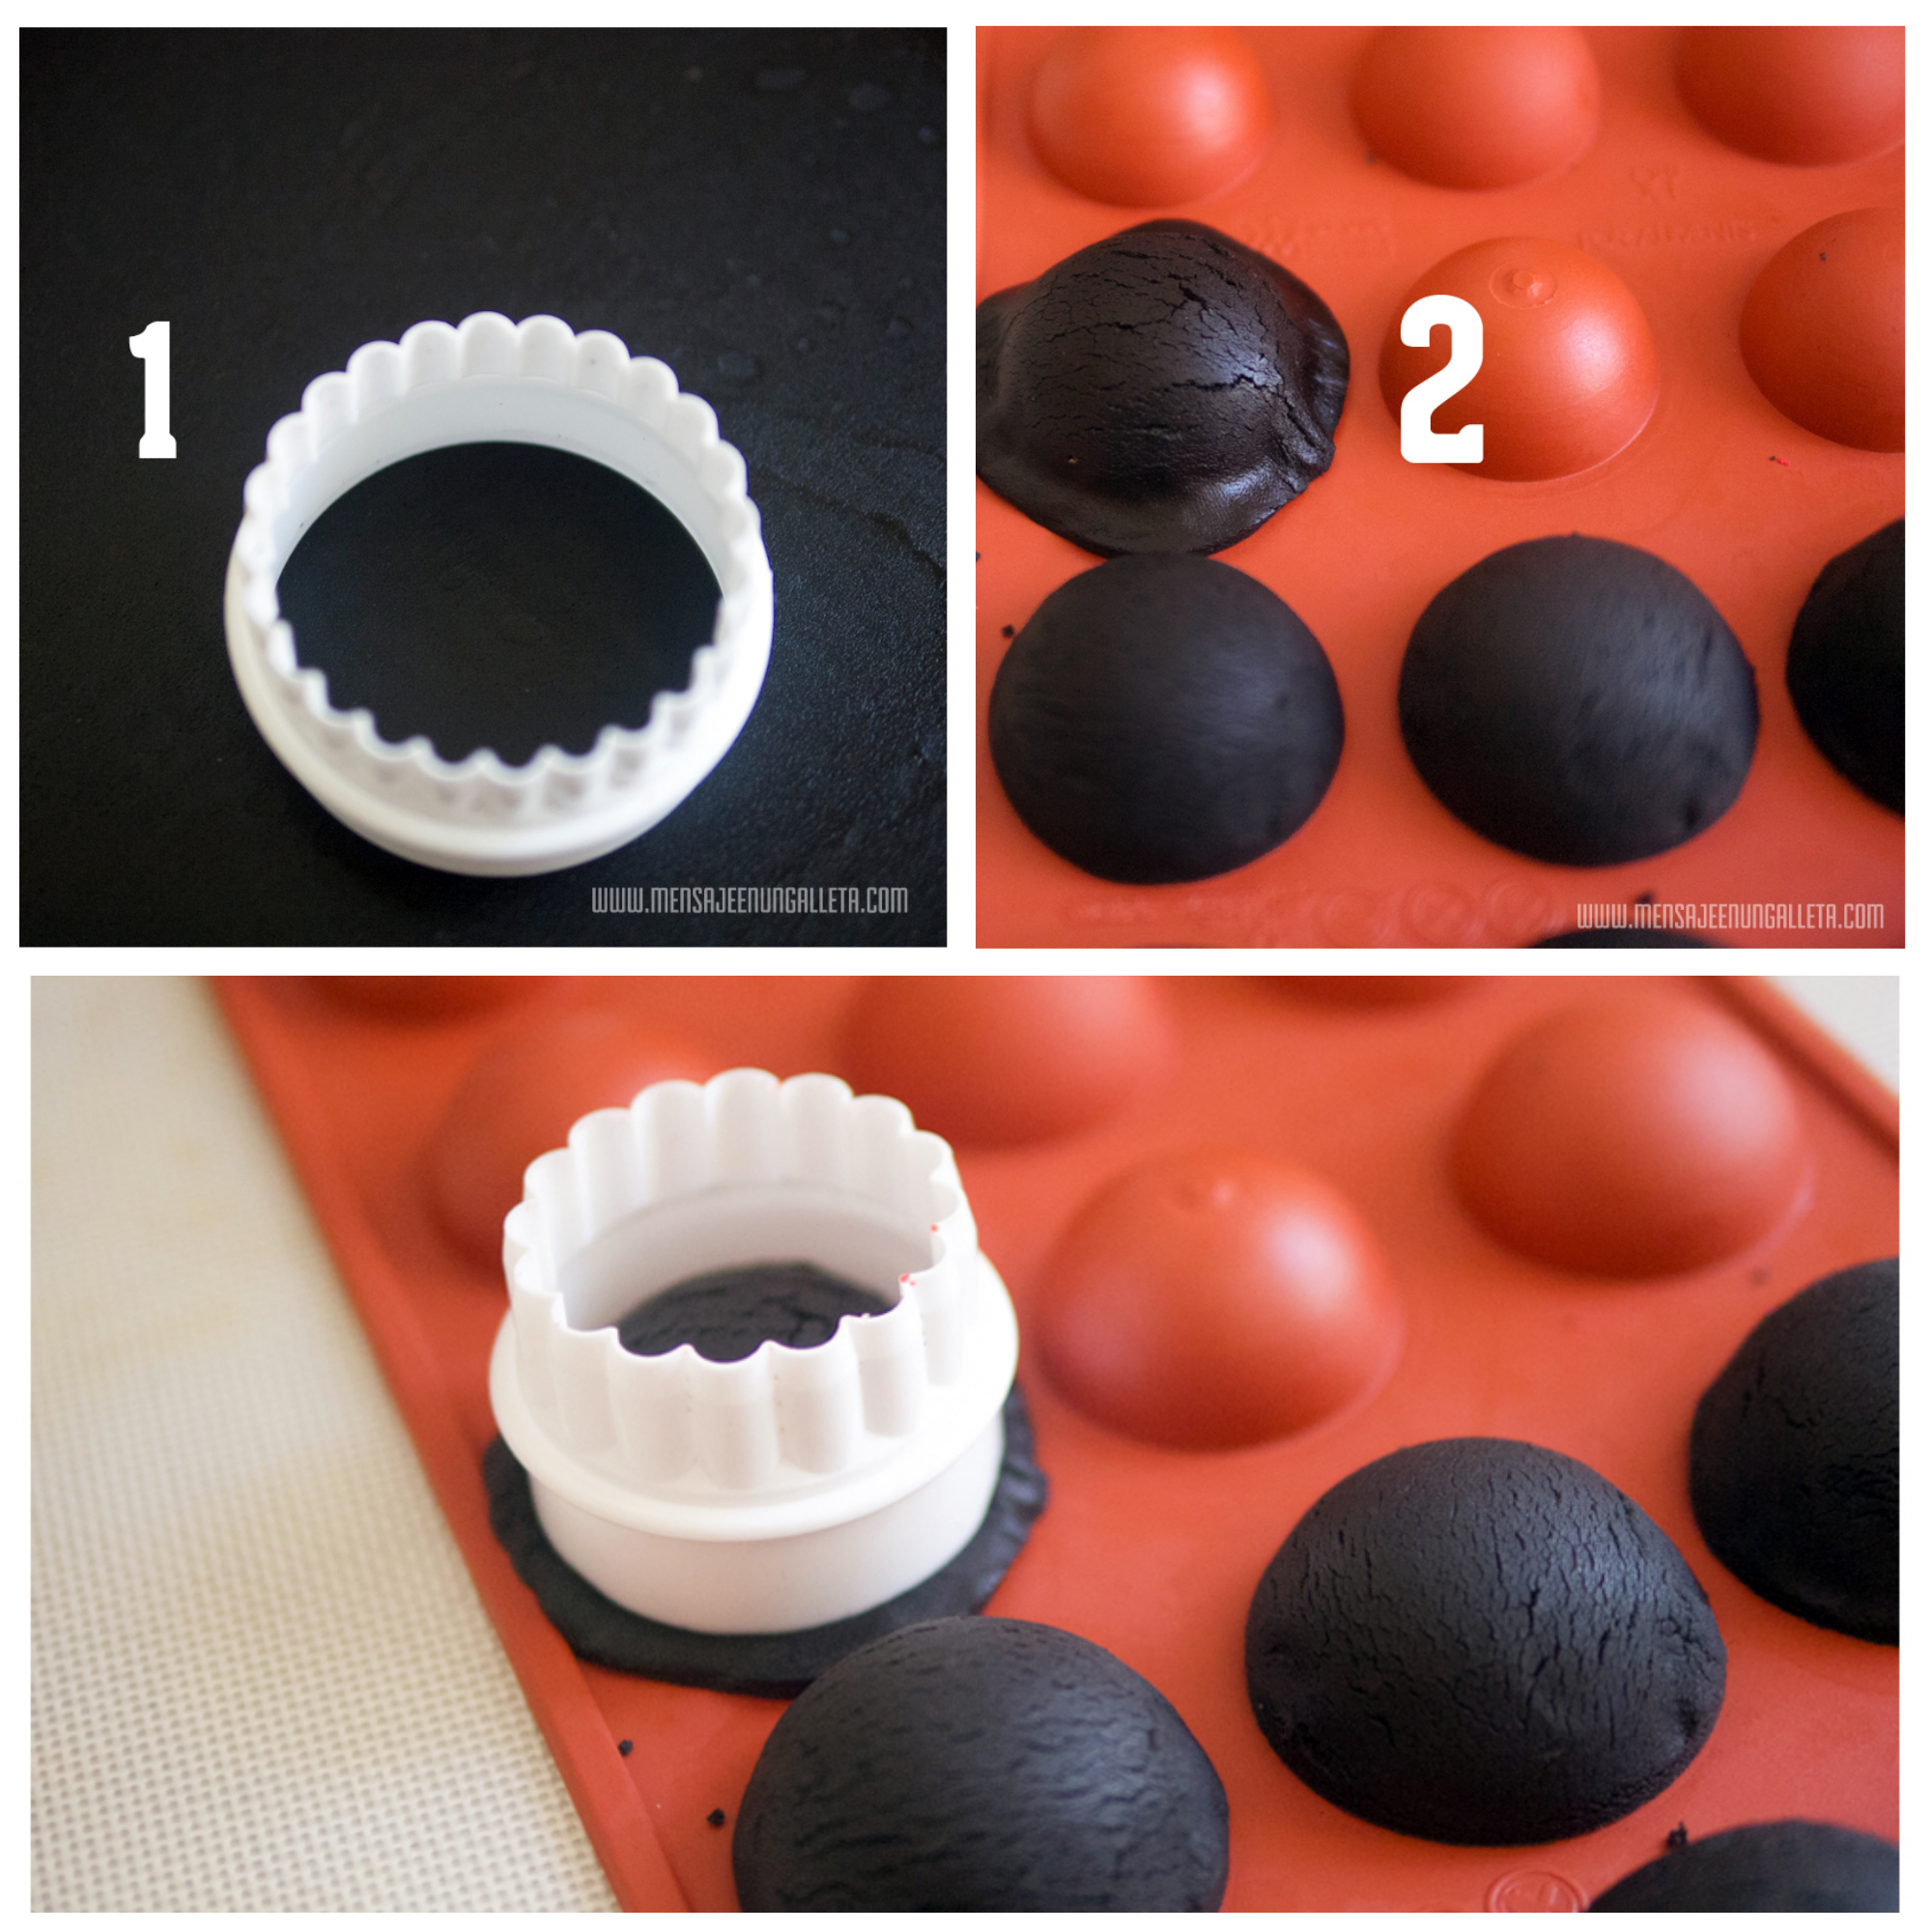
Fijaos en la foto:
1 – Con el cortador mediano cortamos un círculo
2- Colamos el círculo sobre la semiesfera y ajustamos con los dedos.
3- Con el cortador redondo pequeño cortamos el exceso de masa.
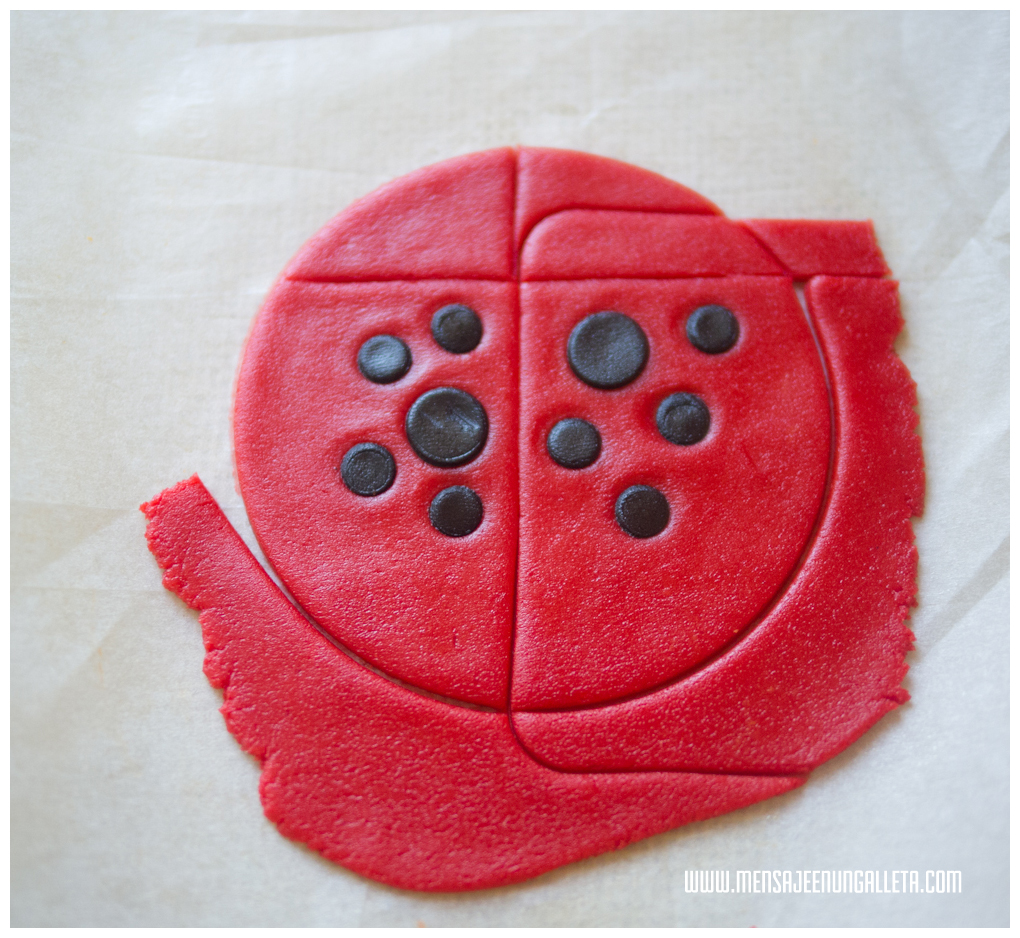
¿Preparadas para sufrir? Estiramos la masa coloreada en caliente con un grosor de 2 mm. Lo hacemos sobre un trozo de papel de hornear para que podamos transportarla y separarla con “facilidad”. Marcamos el círculo grande y con el cuadrado definimos las intersecciones.
Estiramos lo más fina que podamos la masa negra y la metemos unos minutos al congelador. Cortamos pequeños circulitos y los incrustamos en la masa coloreada. Lo hacemos con cuidado y con el dedo, creo que se pueden sacar mis huellas dactilares de la foto.
Colocamos sobre las semiesferas negras con muchísimo cuídado, apretamos y retiramos el exceso otra vez con el cortador pequeño, pero esta vez mucho más despacio, y con menos presión, para que no llegue a verse la masa negra de debajo. Horneamos unos 8 o 9 minutos a 180º C.
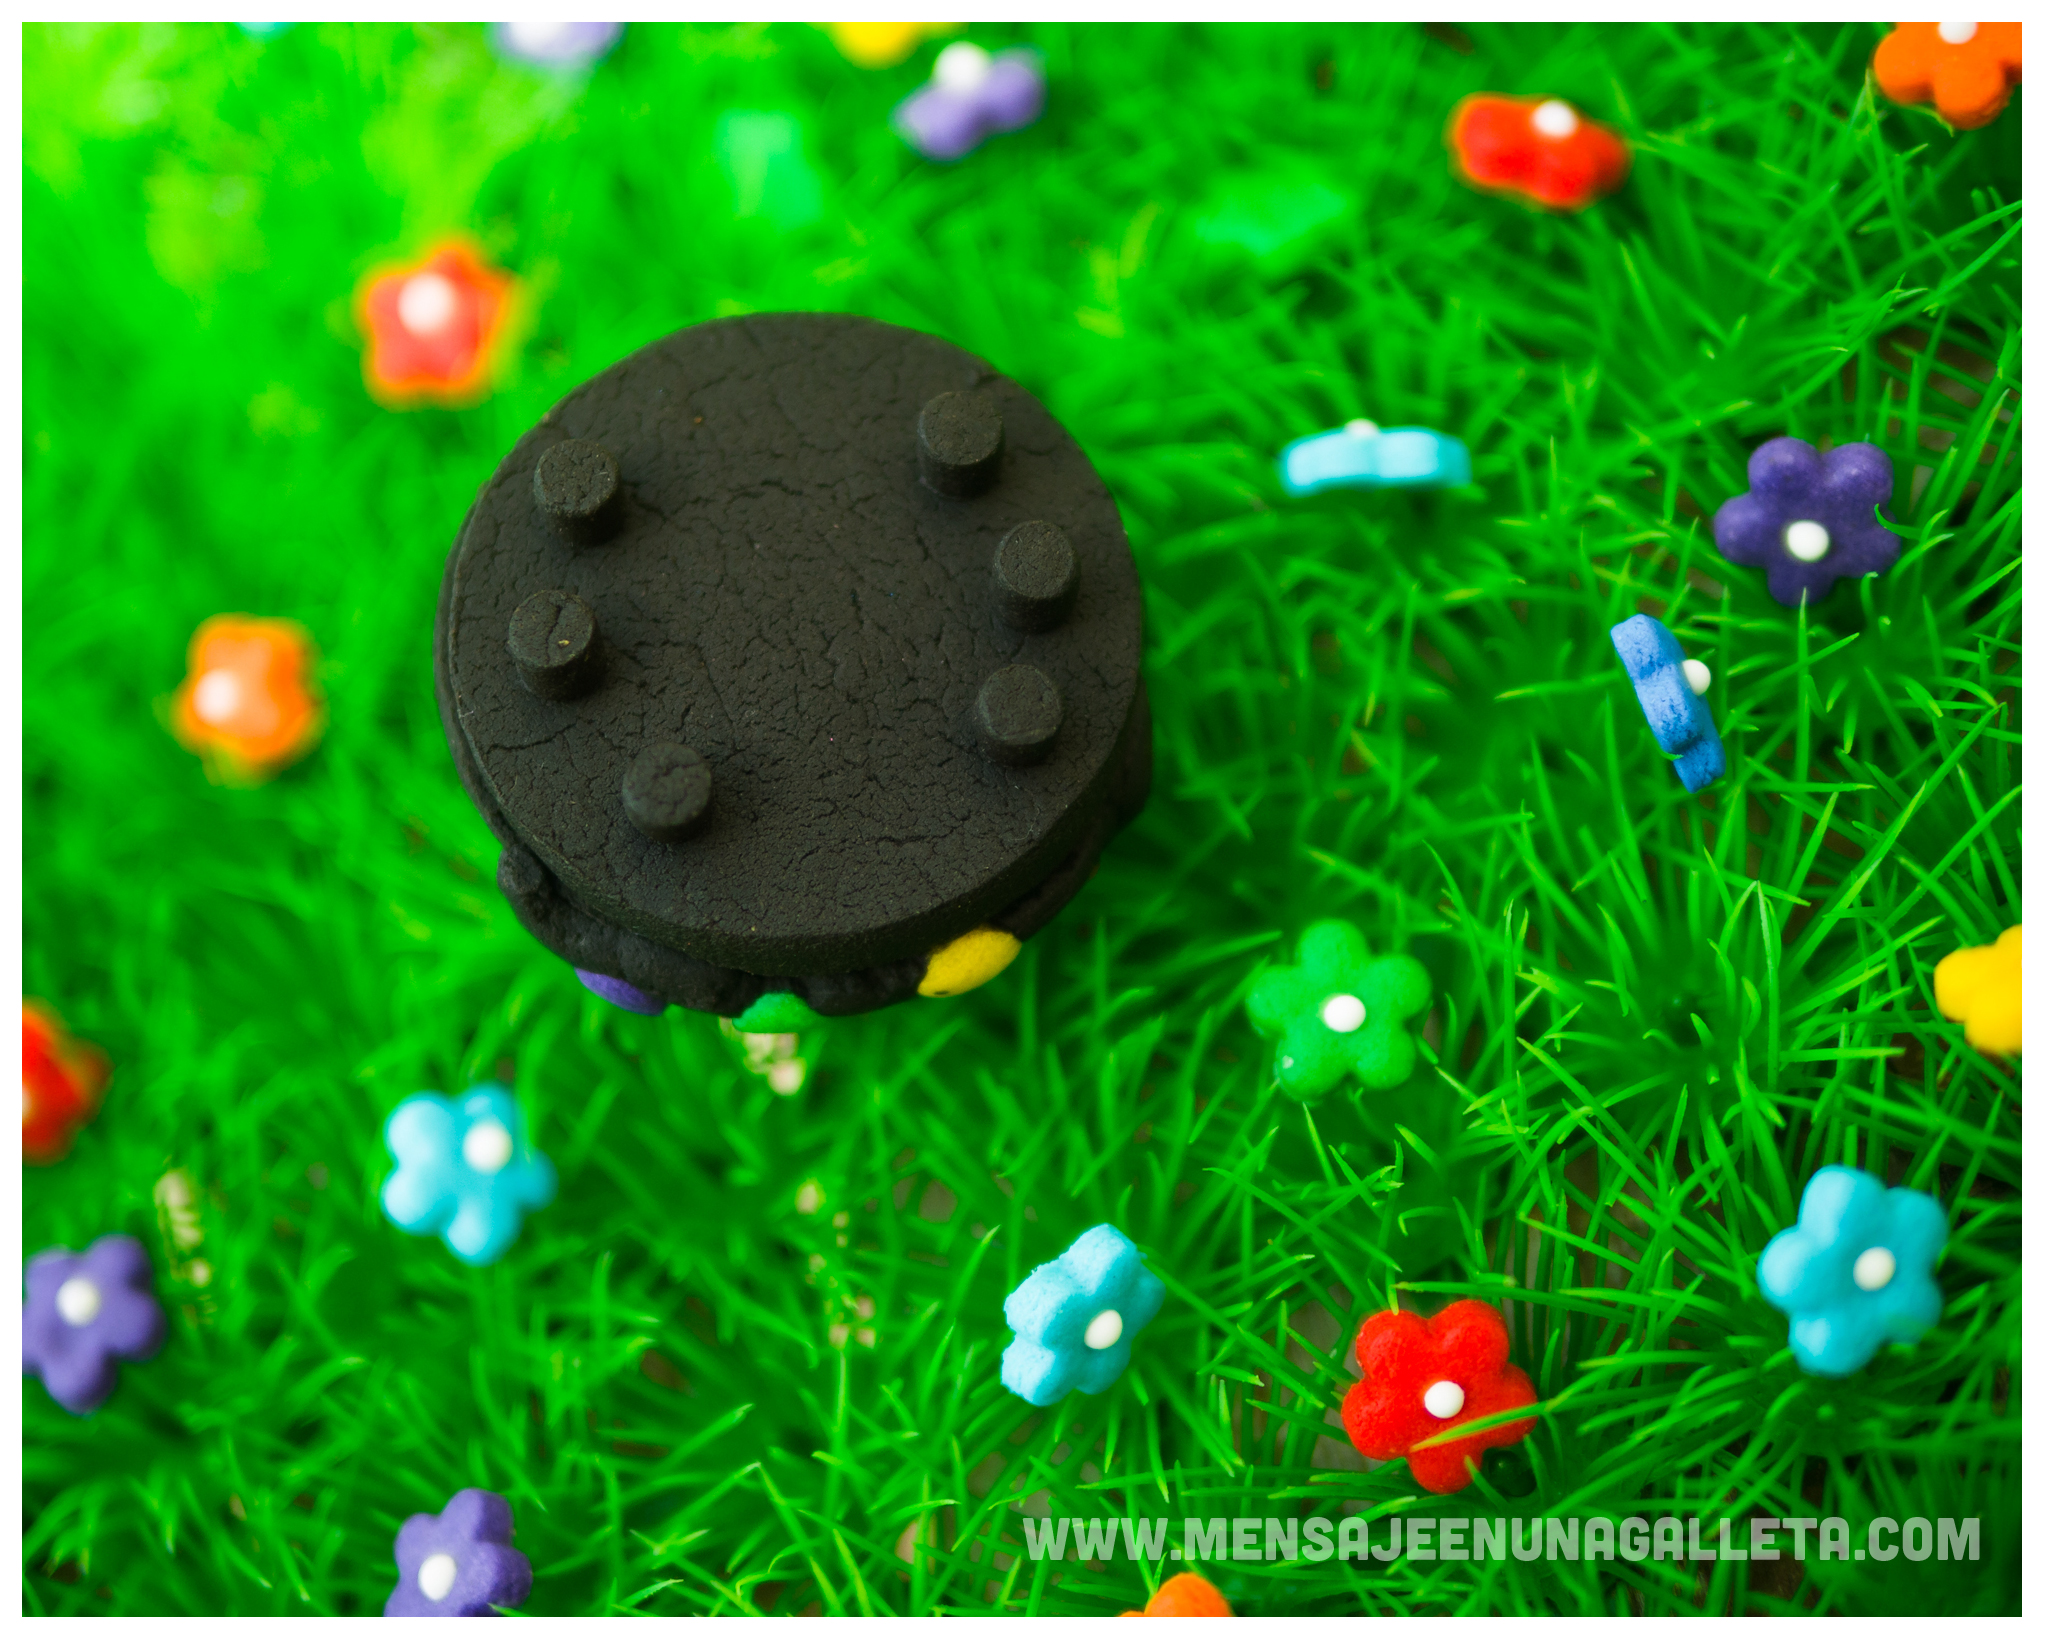
Con el cortador de galleta pequeña preparamos círculos y sobre ellos colocamos círculos diminutos, seis, que simularán las patitas del insecto. No hace falta ningún pegamento, se unen en el horno.
Cortamos y horneamos millones de flores minúsculas. Y les colocamos un puntito de glasa blanca en el centro.
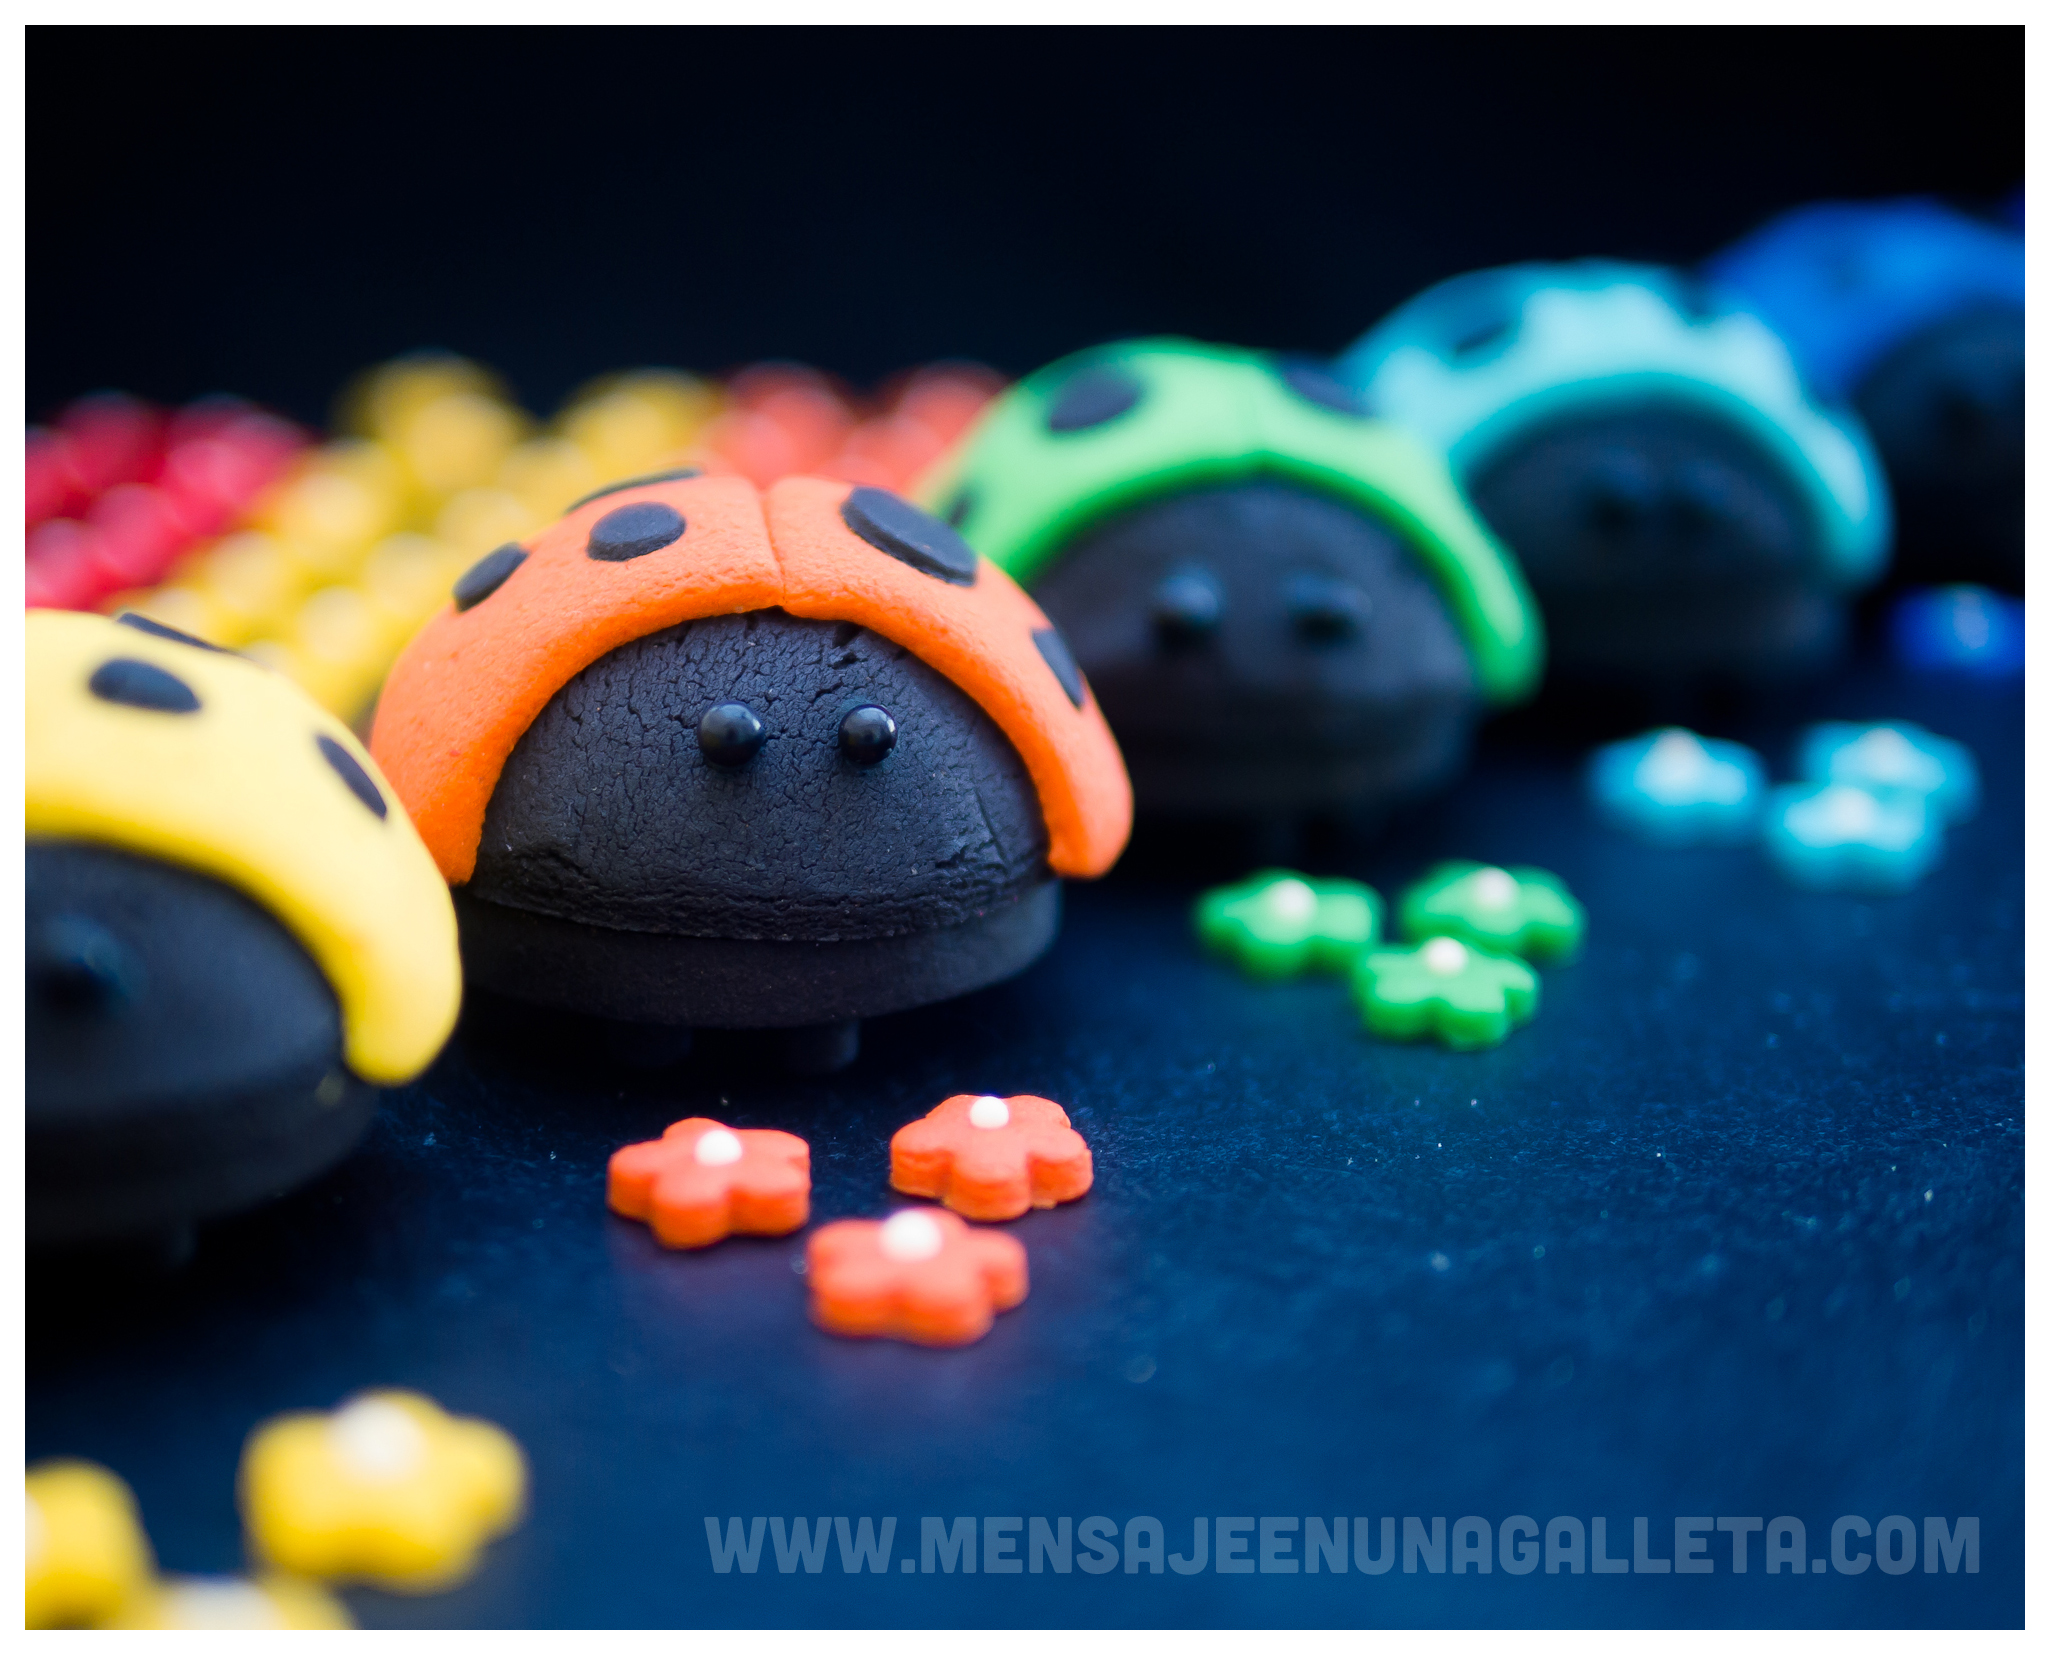
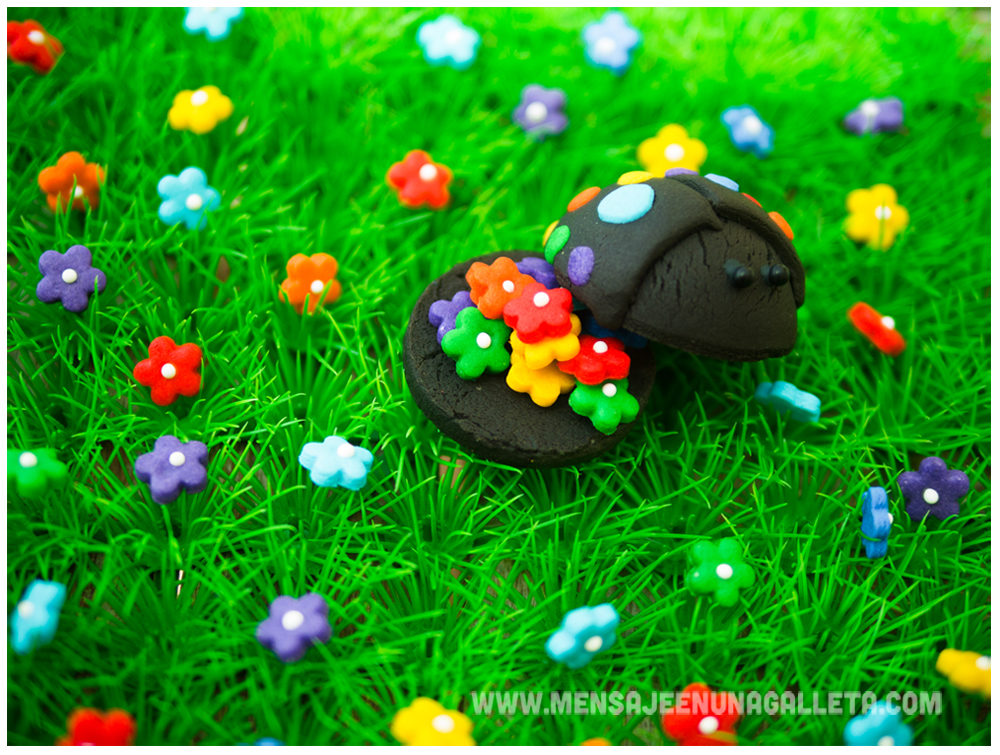
Finalmente rellenamos la mariquita de flores y la colocamos sobre sus patitas.
Y por último, tras un par de días de mucho trabajo, casi sin haberles sacado ninguna foto a tus preciosas galletas, te sientas y observas (con terror) desde la distancia como un grupo de ¿niñas? las devoran.
Un beso, Miriam G.
In order to make the ladybugs that appear in the video, we need a lot of patience and:
-Chocolate cookie dough
-Butter cookie dough
-Little black balls for the eyes (and a drop of black royal icing to glue them)
-A few drops of white royal icing for the centre of the flowers.
We start with the butter cookie recipe, this time with coconut flavor. I have not say this for a while but it takes exactly the same to prepare a recipe slowly than quickly. But if we do it quickly, we make a mess and the result will come out worse. I always separate all the ingredients in bowls before I start, it seems to be more work for us but in the end it’s not. And most of all, it prevents us from making mistakes.
-100 grams of icing sugar
-50 grams of Light corn syrup, if we do not have it, we will add another 50 grams of
sugar, but the syrup gives elasticity to the dough. And believe me when I tell you it
will be useful.
-225 grams of butter at room temperature.
-1 organic or free-range egg, size S. (We always use eggs whose numeration starts with zero or one)
– A teaspoon of salt.
– A teaspoon of coconut flavour. Coconut and chocolate are a perfect combination. You can choose any other transparent flavour that you like, or simply not to use it.
– 400 grams of flour.
– Food coloring. This time I have used Modecor dust colors.and Iam very pleased, they do not change the dough texture, and the best thing is that they do not add any flavour to it. This week I will order half a ton of each color from HelloCakes.es.
We beat butter, sugar, and salt just enough to mix the ingredients without incorporating air to the mixture. Then we add the light corn syrup, the egg, flavour and mix again. When we have a cream with a smooth texture, we add the flour in two or three times. We knead for a while and let the dough rest.
The last step is to dye the dough in the colour we want for our ladybugs. I used seven different colours with the intention of creating a rainbow, but I swapped the positions of yellow and orange and when I noticed it, those cookies were already gone.
For the chocolate cookie recipe the ingredients are:
-100 grams of icing sugar
-50 grams of light corn syrup; if we don’t have it we will add another 50 grams of sugar.
-125 grams of butter at room temperature.
-230 grams of flour.
-1 organic or free-range egg, size S.
-A teaspoon of salt.
– 50 grams of Valor pure powdered cocoa.
– A teaspoon of vanilla aroma.
-Black food colouring.
With our two types of dough ready, now we are going to see what tools we need. They are not too many or too hard to find.
-My super brand new Joseph&Joseph rolling pin, courtesy of MummyCraft.
-A silicon mould with semicircular cavities.
-Three round cookie cutters, decreasing in size, the smallest has to have a diameter similar to the one of the semicircular cavities.
-Two very small round cutters. (Yes, fondant cutters, but you already know my theory, there are no such things as fondant cutters, just cutters for very small cookies).
-A small flower cookie cutter
-A big square cookie cutter
Take a look at the pictures:
1-With a medium size cutter we cut a circle.
2-We put that circle of dough on the semicircular cavities and adjust using our fingers.
3-With the small round cutter we cut the dough excess
Ready to suffer? We roll out the coloured dough, warm, 2 mm thick. We do it on a sheet of parchment paper so we can transport it and separate it ‘easily’. We mark the big circle and with the square cutter we mark the intersections.
We roll out the black dough as thin as we can and put it in the freezer for a few minutes. We cut small circles and embed them in the coloured dough. We will do it very carefully and using a finger, actually I think you can even get my fingertips from the picture.
We place them on the semicircles very, very carefully, press a bit and remove the excess again using the small cutter, but this time very slowly and applying less pressure so the black dough underneath is not visible. We bake for 8 or 9 minutes at 180º
Using the small cookie cutter we make some circles and place minuscule circles on them, six to be precise, which will simulate the tiny insect legs. There’s no need for glue, they will get fixed in the oven.
We cut and bake millions of tiny flowers. We add a small drop of white royal icing in the centre.
Then, we fill the ladybug with flowers and place them on their tiny legs.
And finally, after a couple of days of hard work, and having taken just a few pictures of your beautiful cookies, you sit down and (terrified) you observe from a distance how a group of girls? devour them.
Love, Miriam G.
