El gran juego fotográfico de las Navidades

xmasmeuggogo

¿Qué tal el frío? ¿Notáis que se acerca la Navidad? ¿Os vais al Caribe? ¿La pasáis en familia?

Nosotras no queremos perdernos nada, nada de vuestras Navidades. Queremos ver fotos, muchas, en Cáceres o en Groenlandia, con comida o sin ella, con las nubes pasando o el horizonte despejado, rodeadas de gatos o de árboles de Navidad, no importa, las queremos ver TODAS. Por eso hemos organizado EL GRAN JUEGO FOTOGRÁFICO DE LAS NAVIDADES. Participar es muy sencillo. Solo necesitáis tener una cuenta en Instagram y un móvil que haga fotos.

Los premios son tres plazas en tres talleres de La tallerería, la que elijáis.

xmasmeuggogo2

Las normas a seguir para participar son muy sencillas:

– Tenéis que ser seguidores de ambos blogs en Instagram:

http://instagram.com/mensajegalleta/

http://instagram.com/cupcakesagogo

– Cada vez que subáis una foto -no hay límite en cuanto al número – para que participe en el concurso tenéis que etiquetarnos @mensajegalleta, @cupcakesagogo y usar el hashtag #XmasMeugGogo.

– Las fotos tienen que estar tomadas con el móvil y subidas directamente, usando sólo los filtros disponibles en Instagram.

– Podéis empezar a subir fotos ahora mismo y hasta el  6 de enero.

– El día 7 de enero publicaremos el nombre de los tres ganadores.

– El jurado está compuesto, por nosotras: Belén, Estíbaliz y Miriam. No valoraremos la técnica, ni la calidad, sino especialmente la mirada que hay en cada foto.

Podéis ver las fotos que nos van llegando pinchado aquí.

Un beso gordo de las tres.

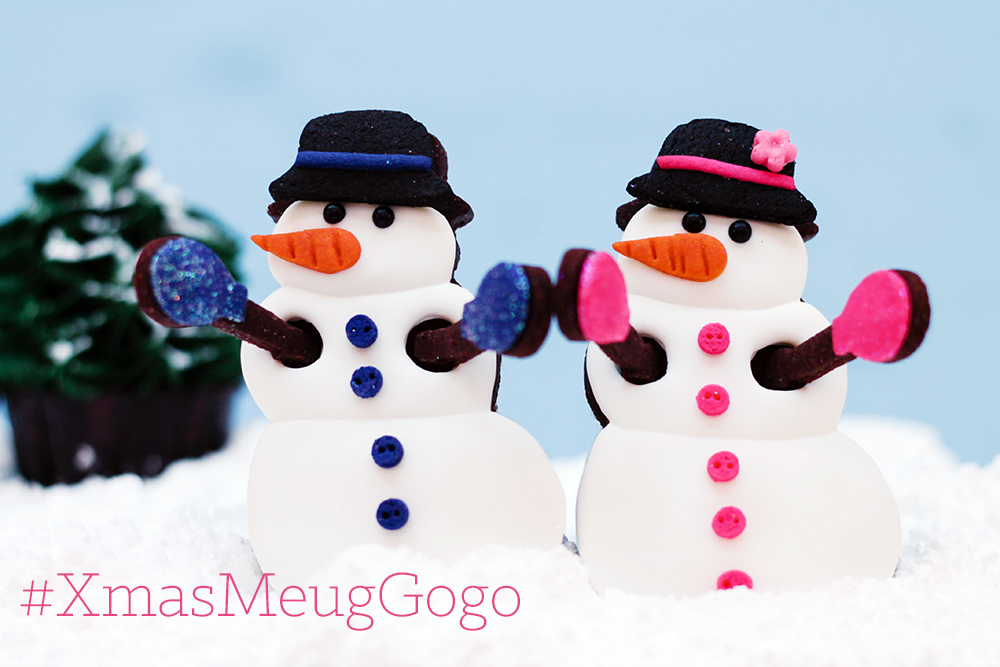
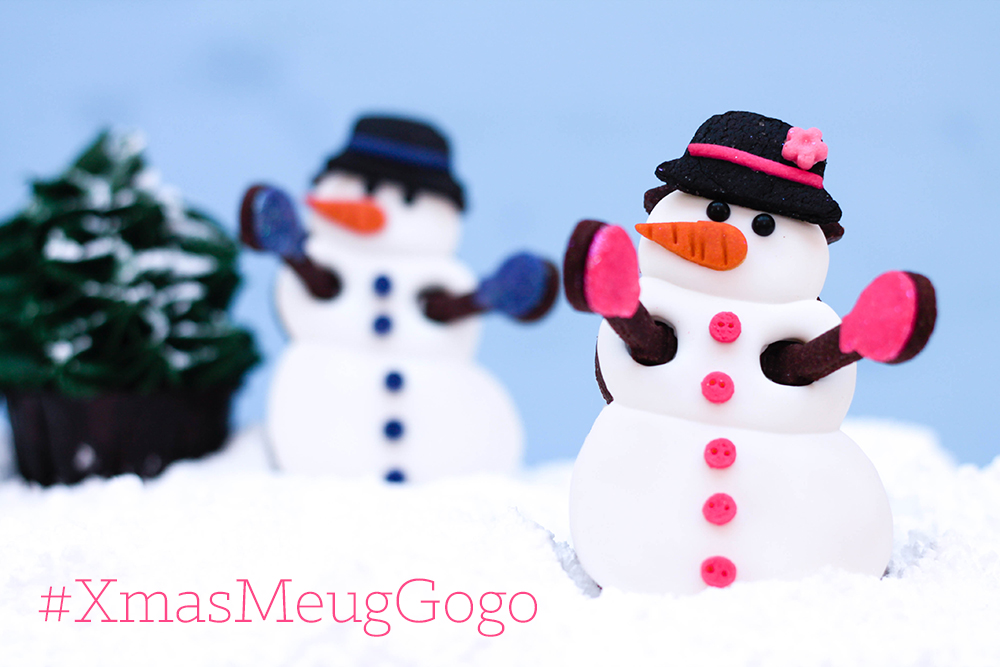
Si os asaltan las dudas, la respuesta es no, ni una gota de fondant, todo es de galleta o de glasa. Los brazos son cucharitas de un juego de cortadores de café, y las manoplas, parte de esa misma cucharita 😉

xmasmeuggogo3

Galletas de jengibre para decorar, la receta definitiva. Gingerbread cookies to decorate. The definitive recipe.

genjibrecandela

A la pregunta ¿Existe un cortador de hombrecillo de jengibre tan grande? La respuesta es sí, lo venden Alemania, y una buena amiga me lo ha mandado, ¡gracias Lola! Es estupendo.

El gusto español, y por gusto me refiero al sentido, es delicado. Al español medio, una cantidad moderada de picante le pica una barbaridad, y una cantidad razonable lo lleva a urgencias. Lo mismo ocurre con las especias, si lleva alguna, ya lleva muchas, y si lleva muchas solo por el olor rechaza el plato. No es mi caso, mastico los chiles, y abuso de las especias cuando cocino, pese a esto, las galletas de jengibre me gustan suaves, quizá porque el jengibre no me gusta nada. He estado a punto de no echarle, pero me pareció complicado “vender” la receta definitiva de galletas de jengibre, sin jengibre. Pero no importa, si te gusta con mucho jengibre échale más, o si quieres añádale cayena, yo no le puse por las niñas, cambiará el sabor, pero no la textura, ni facilidad con la que se corta y se trabaja con esta masa.

Ingredientes:

– 100 gramos de azúcar moscabado, lo sé, me he enamorado, se lo pongo a todo. Pero si no tienes puedes ponerle azúcar moreno, cuanto menos refinado mejor.

– 75 gramos de miel de caña. Yo he usado una malagueña facilísima de encontrar, al menos aquí.

– 200 gramos de mantequilla a temperatura ambiente.

– 1 huevo pequeño.

– 400 gramos de harina, más la que admita.

– 1 cucharadita de nuez moscada en polvo.

– 1 cucharadita de jengibre en polvo.

– 1 cucharadita y media de pimienta rosa (o una de pimienta negra).

– 2 cucharaditas de canela.

Preparación:

Ponemos en la thermomix o en un molinillo el azúcar y las especias, bolitas de pimienta rosa incluidas, y molemos hasta obtener un polvo fino. Añadimos la mantequilla y mezclamos bien. Añadimos el miel de caña y el huevo y batimos hasta tener una pasta uniforme, añadimos los 400 gramos de harina en dos veces y mezclamos muy bien. Ponemos la masa sobre un tapete enharinado y vamos añadiendo poco a poco la harina que nos pida, cuando no nos pida más amasamos un poco y aplanamos con la mano hasta obtener una altura que sea más o menos el doble de la que queramos para las galletas, enfriamos un rato en el frigorífico y estiramos. Estirar la masa fría nos garantiza una superficie lisa. Volvemos a enfriar y cortamos y horneamos.
horno

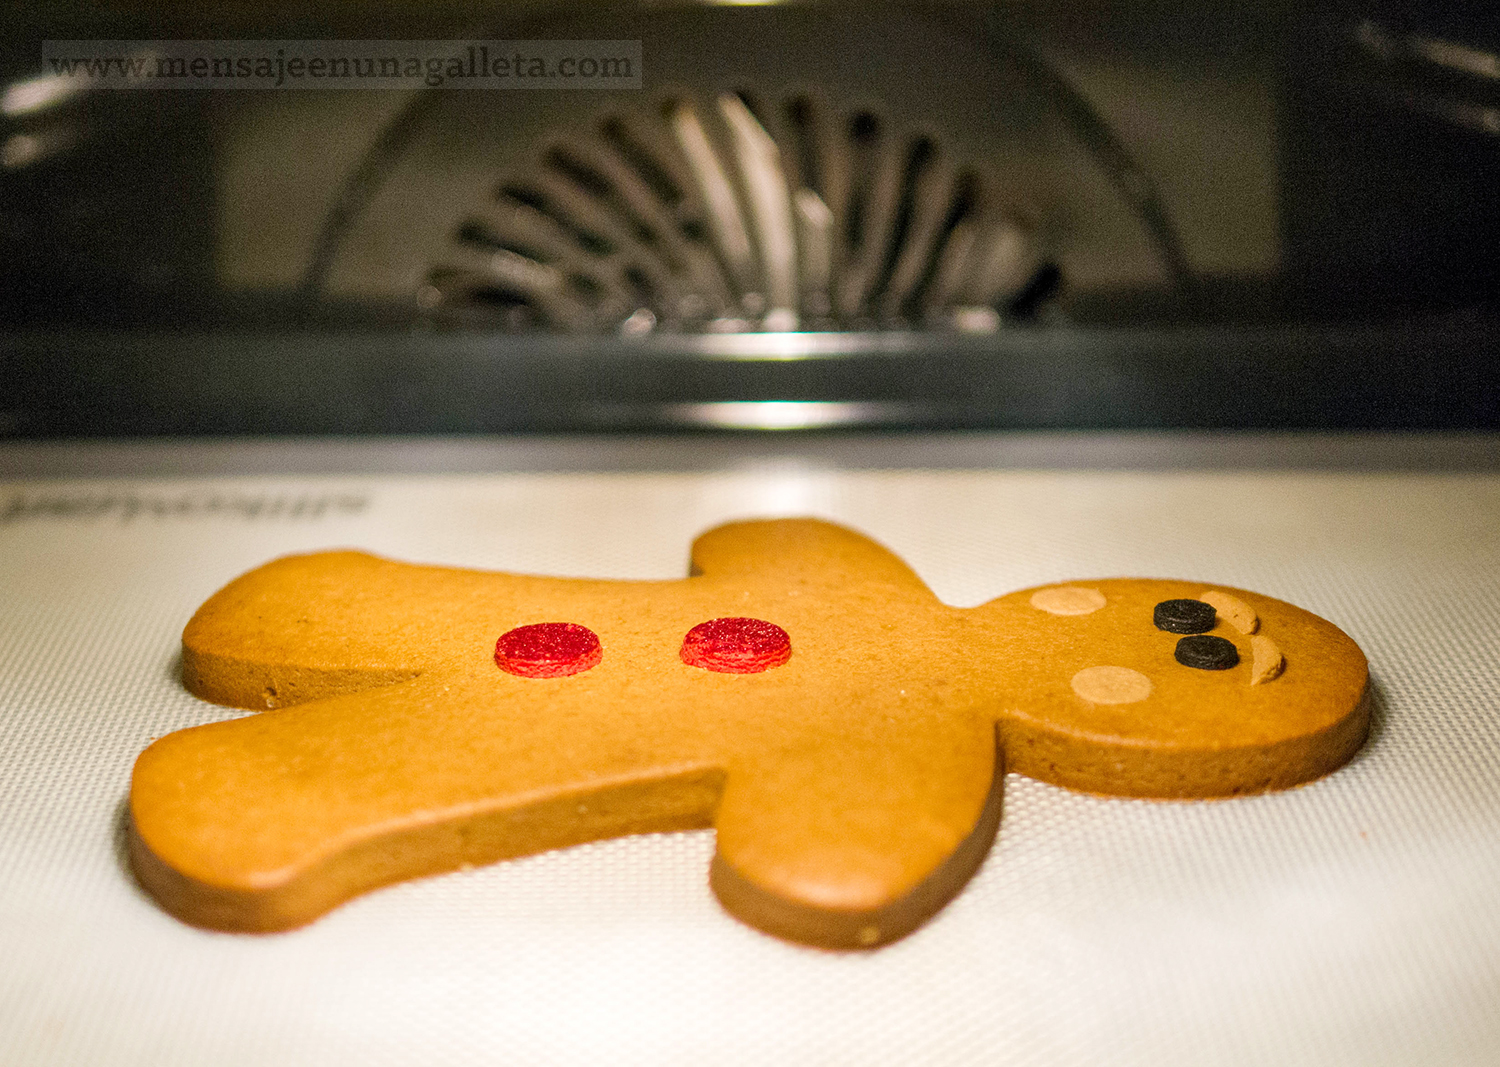
Truco para hornear megagalletas: Hornear 10 minutos a 180 grados o hasta que la masa se vuelva mate, bajar la temperatura a 150 grados y hornear otro buen rato, 15 minutos en mi caso. Apagar el horno y dejar la galleta dentro todo lo que podamos.

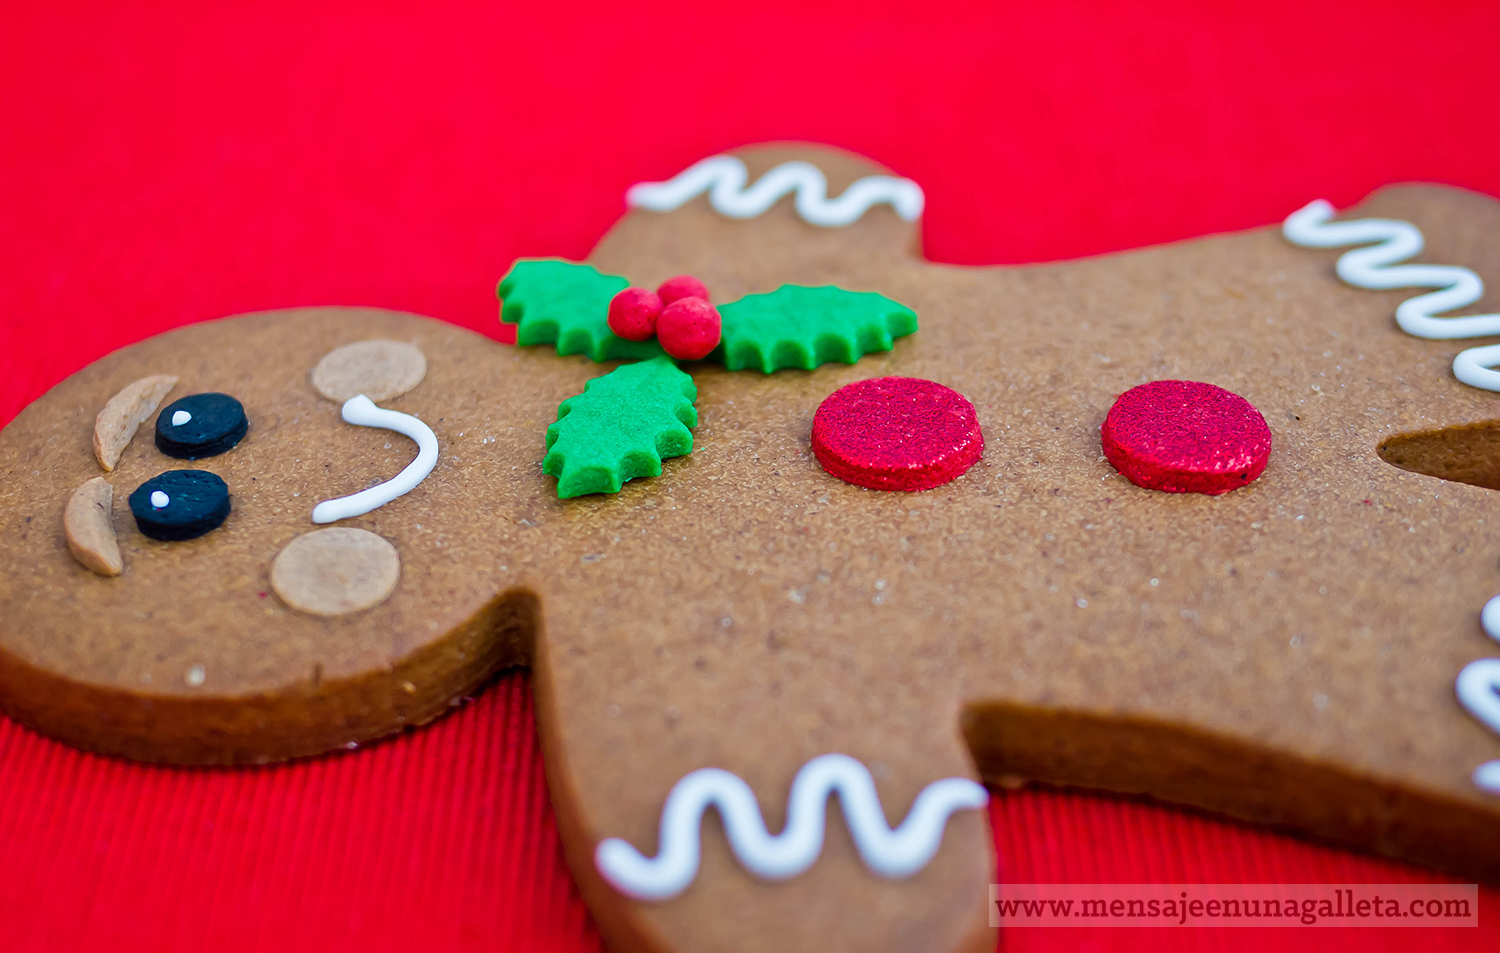
Y ahora vamos con la decoración. Lo blanco es glasa, todo lo demás es masa. Y casi toda la masa de decoración va al horno junto con el hombre de jengibre porque así se pega:
detalles

– Los ojos son de masa de chocolate coloreada de negro, la preferida de mis hijas, se los arrancaron y se los comieron lo primero

– Cejas son de masa de jengibre con un pelín de colorante blanco.

– Coloretes, de masa de jengibre también, muy muy finos, de menos de 1 mm. Os cuento cómo lo hago, cojo el rodillo blanco de fondant sin ninguna anilla, estiro la masa finísima y marco el círculo, enfrío y, muy frío, saco el círculo y lo coloco sobre el muñeco. Nota, tengo las manos heladas, eso ayuda.

– Botones, son de masa de vainilla roja, con purpurina. Y sí, la purpurina se puede hornear. Se estira la masa roja y se extiende sobre ella purpurina roja, después se corta.

Transfer de masa pegado con glasa al muñeco:

– Acebo, masa de vainilla coloreada. Las hojas las he cortado con un cortador con expulsor. No existe esa cosa… ¿Cómo se llama? ¿Cortadores de fondant? Solo es que algunas galletas son grandes y otras más pequeñas. Las bolitas rojas también son de masa, si las horneas juntas se pegan.

Y por fin la glasa, para boca, brazos, piernas y pupilas.

genjibremaria

Por favor, cuando probéis la receta contadme qué os ha parecido.

Un beso, Miriam G.

(¡Muchísimas gracias Gloria!)

genjibrecandela

The question: is there a gingerbread man cookie cutter that big? The answer is yes, they sell it in Germany, and a good friend has sent it to me. Thanks Lola! It’s great!

Spanish taste, and by taste I mean the sense, is delicate. For the average Spaniard, a moderate amount of spice tastes super spicy, and a reasonable amount of it, takes him to the E.R. immediately. The same happens with spices themselves, if you add some, they seem to be too many, and if you add a lot of them, just the smell makes you reject the dish. It’s not my case, I chew chili peppers, and I abuse them when I cook. In spite of this, I like my gingerbread cookies to have a delicate flavor, maybe because I do not like ginger at all. I have been about not to use it, but then it would have been complicated to ‘sell’ the definitive gingerbread cookies recipe without any ginger at all. It doesn’t matter, if you like ginger, add more, or add some cayenne if you prefer; I didn’t use it because my girls don’t like it, it will change the flavor a bit, but not the texture, and the dough will be equally easy to cut and work with.

Ingredients:

– 100 grams of muscovado sugar; I know, I’m in love with it, I use it in every recipe, but if you don’t have it, you can use brown sugar, the less refined the better. 

–  75 grams of cane honey. I’ve used a local brand, very easy to find in this area.

–  200 grams of butter, room temperature.

– 1 egg (S)

–  400 grams of flour, plus whatever amount it needs.

–  1 tsp. of powdered nutmeg

–  1 tsp. of powdered ginger.

–  1 ½ of pink pepper (or 1 tsp of black pepper).

–   2  tsp. of cinnamon

Elaboration:

In the Thermomix or in any other robot we grind the sugar and the spices, pink pepper seeds included, until we get a fine powder. Then we add the butter and beat well. Add the cane sugar and the egg and beat until obtain a uniform dough. Incorporate the 400 grams of flour in two batches and mix very well. Put the dough on a floured surface and little by little start adding all the flour it needs; when it asks for more, we knead a bit and flatten the dough until we get a height that is more or less double the one we want for our cookies. Let it cool in the fridge and roll out. When we roll it out cold, this guarantees us a complete smooth surface. We put it back in the fridge and after a while we cut it and bake it.

horno

A trick to bake huge cookies: bake them for 10 minutes, 180ºC or until the dough gets matt, then lower the temperature to 150ºC and bake for another 10 minutes, 15 in my case. Turn off the oven and let the cookies inside for as long as you can

Let’s go with the decoration.  The white you see on the cookie is royal icing, the rest is dough. And most of the dough used as decoration goes into the oven with the gingerbread man, as that’s the way it sticks to the cookie:

detalles

– The eyes are made with chocolate dough dyed in black, my daughters’ favorite, that’s why they plucked them out and ate them first. 

– The eyebrows are made with gingerbread dough with a bit of white food coloring.

– Blush: very thin gingerbread dough, less than 1mm. I tell you how I make it: I take the white rolling pin that you use with fondant, and without any of the leveling rings I roll out the dough extremely thin, mark the circle, cool the dough, and when it is very cold I take the circle out of the dough and put it on the gingerbread man. Note: my hands are very cold, that helps.

– Buttons are made of red vanilla dough, with some glitter. Yes, glitter can be baked. You roll out the red dough, put the glitter on it and then cut it. 

Dough transfer glued to the cookie using royal icing:

–          Holly leaves are made with colored vanilla dough. Leaves have been cut using a plunger cutter. That thing…how do you call it? Fondant cutters? They do not exist. It’s just that some cookies are big and others are small. The small red balls are also made from dough. If you baked them together, they will glue to each other.

And finally, some royal icing for the mouth, arms, legs and pupils.

genjibremaria


When you try this recipe, please let me know what you thinUn beso, Miriam G.k.

A big kiss, Miriam G.

( Thanks Gloria!)
«Holy-wood» Christmas cards


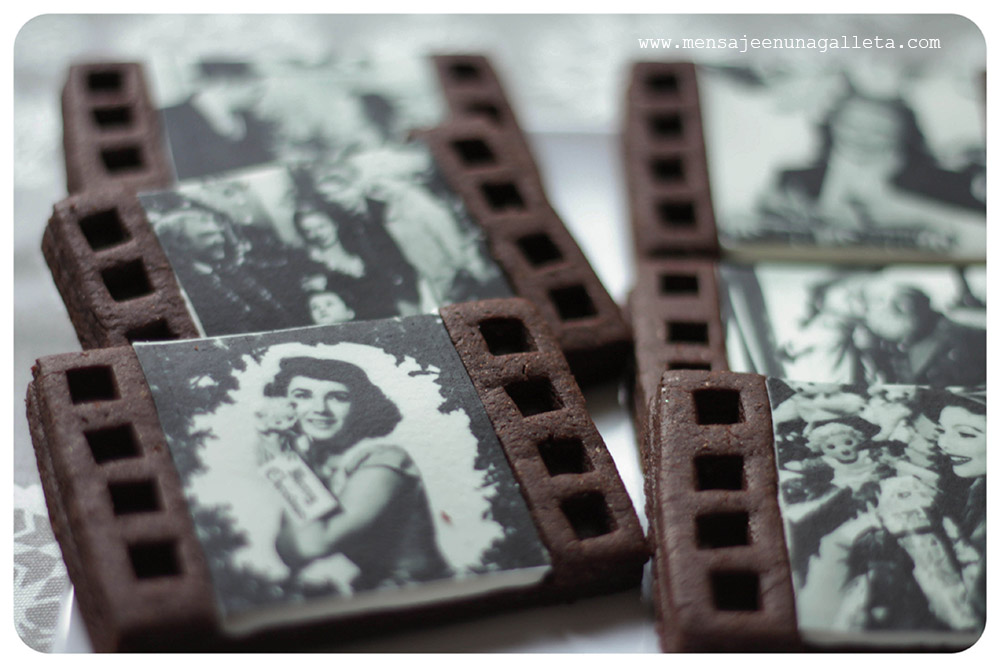
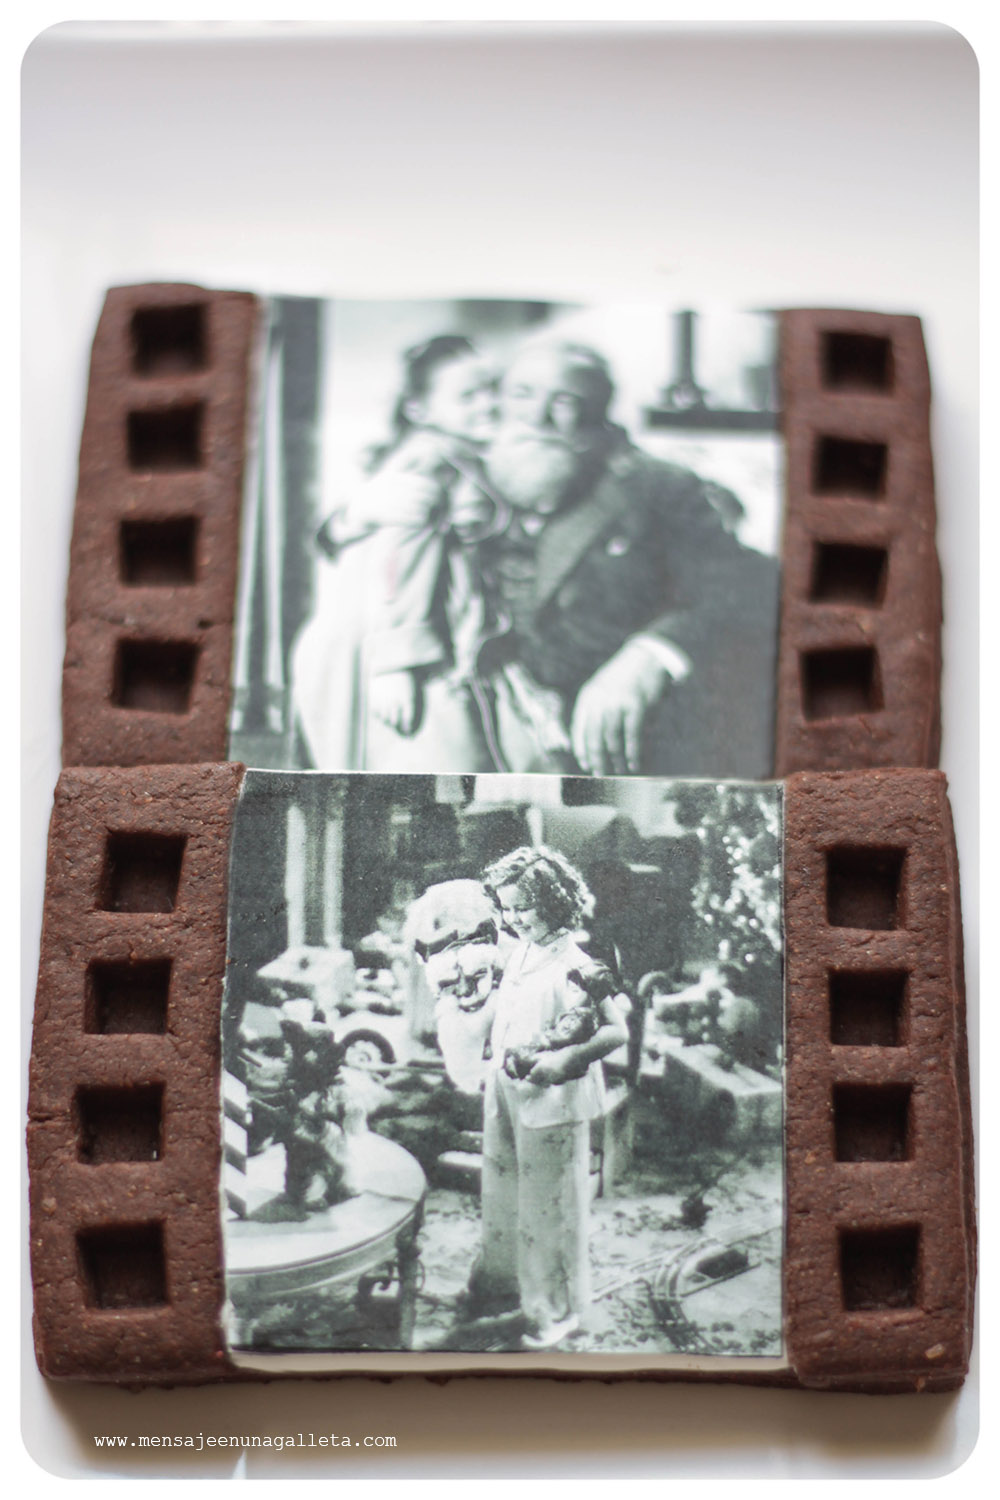
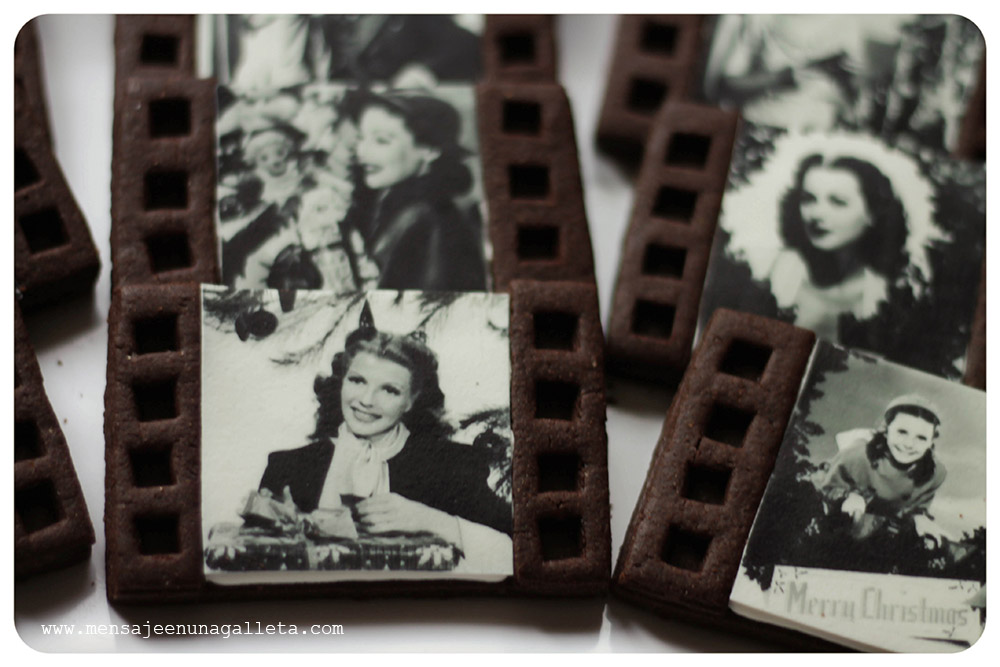
Después de tanto rojo, hemos cambiado de tercio con unas galletas de chocolate de impresión comestible (ya hacía tiempo que no poníamos en funcionamiento la impresora). Como eran con fotos navideñas de actores de Hollywood a Miriam se ocurrió hacer un nuevo diseño para «enmarcar» las fotos, en forma de fotograma.

After all that red, we change the subject to some edible printed chocolate cookies (as we have not used the edible printer for a while). The images to print were Christmas pictures from Hollywood actors, and Miriam thought of a new design to ‘frame’ the cookies, as if they were photograms.

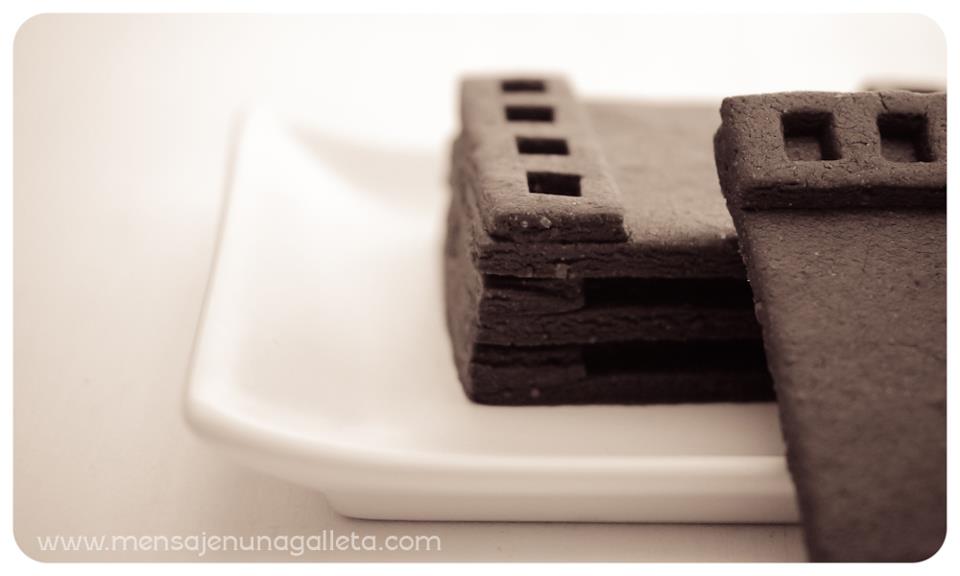
Con un cortador cuadrado pequeñito con expulsor de los de fondant se sacan los cuadrados de unas tiras de masa y se superponen encima del rectángulo grande. Una vez horneado todo el conjunto, se rellena con una capa de glasa y se pega encima la pasta de azúcar con unas gotitas de sirope claro de maíz.

Using a small squared fondant cookie plunger cutter, we take out the squares from a strip of dough and place them on the big rectangle. Once the whole set has been baked, it is filled with a royal icing layer on which we glue the edible printed images using a few drops of light corn syrup.


En este audio podéis oir en la radio a los Cowboys de Medianoche (Luis Herrero, José Luis Garci y Luis Alberto de Cuenca) cómo adivinan los nombres de los actores de las galletas de las postales de Navidad que les mandamos y ¡cómo se las comen! ♥. El momento es a la hora y 21 minutos del programa

Un beso,

Love,

Miriam y Estíbaliz

PS: We love both of you, Gloria and Mª Jesús

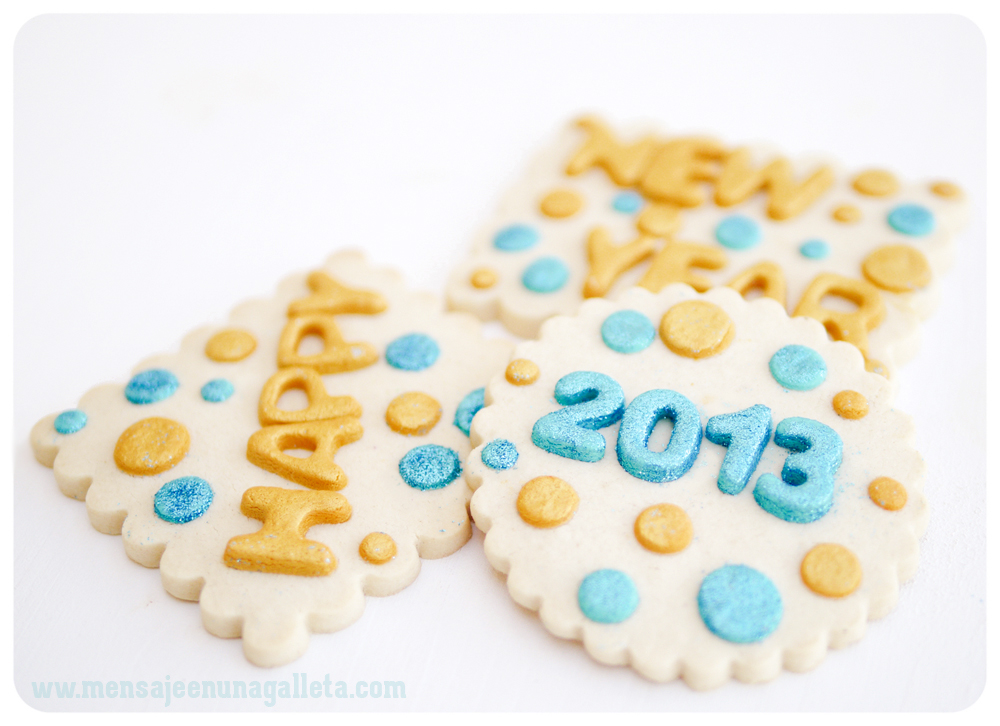
Como conseguir que el 2013 sea un año brillante – How to turn 2013 into a shiny year

Echándole brillantina. 😉

Los polvitos brillantes para repostería los podemos clasificar en dos grandes grupos:

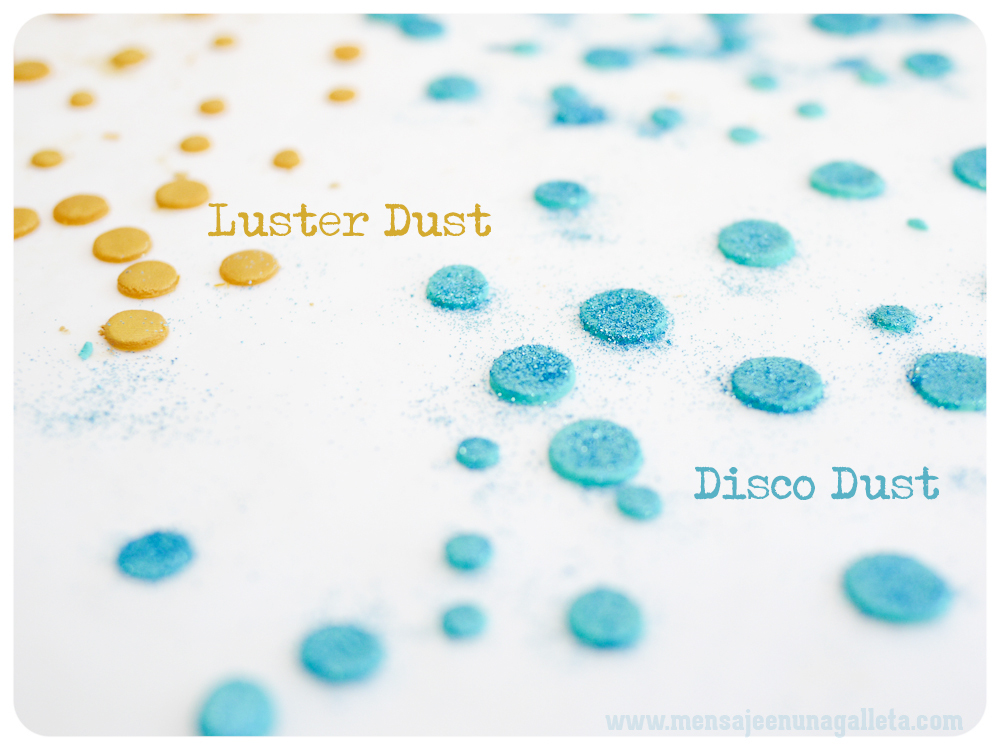
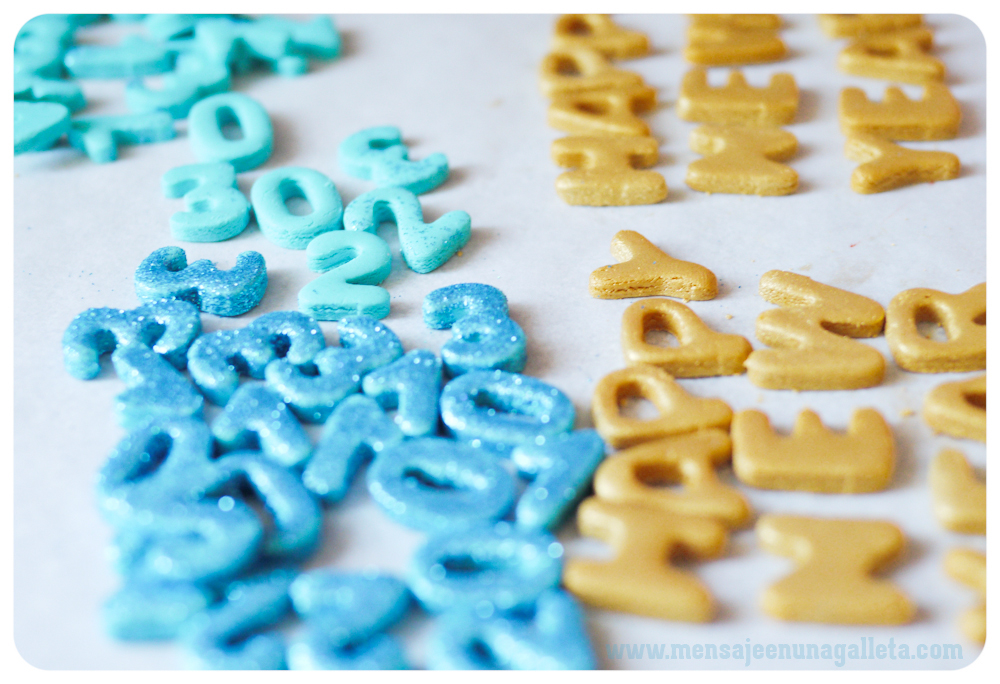
· Brillantina comestible – O para ser exactos no tóxica. Suele venir en botecitos pequeños y en esos botecitos lo que pone es Disco Dust. Para los números y el confeti he utilizado un azul irisado.
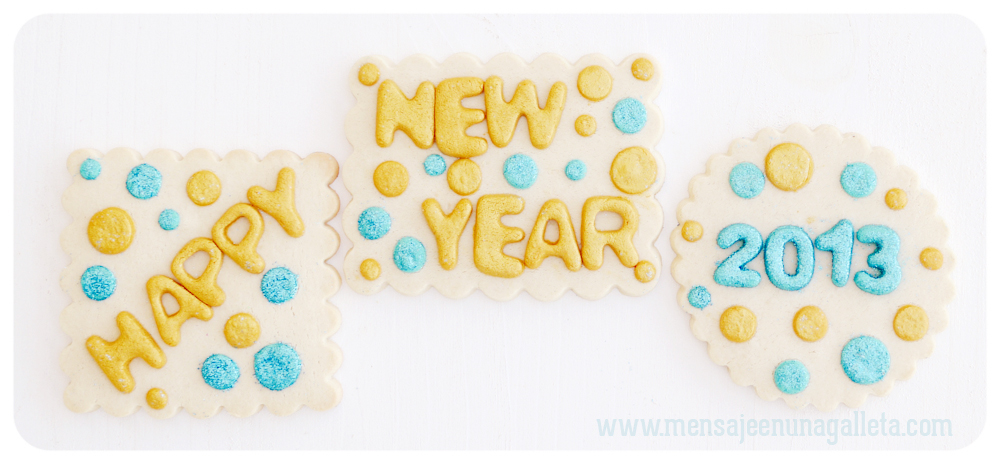
· Brillo comestible – Es parecidísimos a la sombra de ojos, pero la presentación es en polvo suelto en lugar de compacto. También vienen en botecitos y lo que suele poner es Luster Dust. •Para las letras y las burbujas de champan (sí, son burbujas de champán) he utilizado un tono arena metálica dorada, no yo no le puesto el nombre.

Adding glitter.

· Edible glitter – or to be exact, non toxic. It comes in small containers reading Disco Lust. For the numbers and confetti I have used an iridescent blue.

· Edible sparkle – it is very similar to an eye shadow, but instead of being compact, it comes in a loose powder format. You will also find it in small containers reading Luster Dust. For the letters and champagne bubbles (yes, they are champagne bubbles) I have used a metallic golden sand shade (sorry, I have not chosen that name).

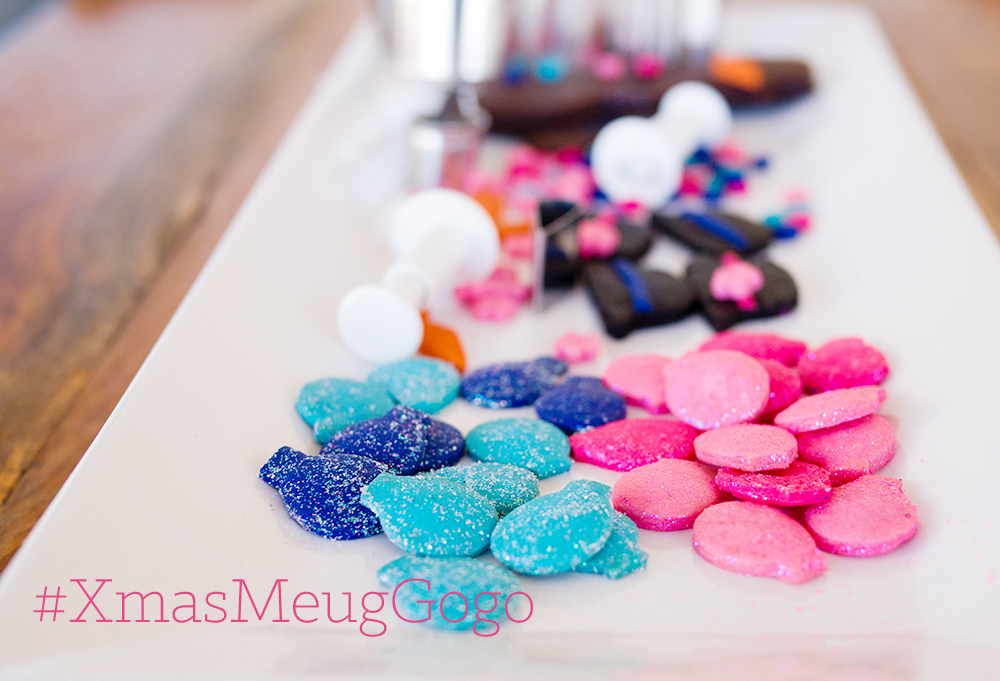
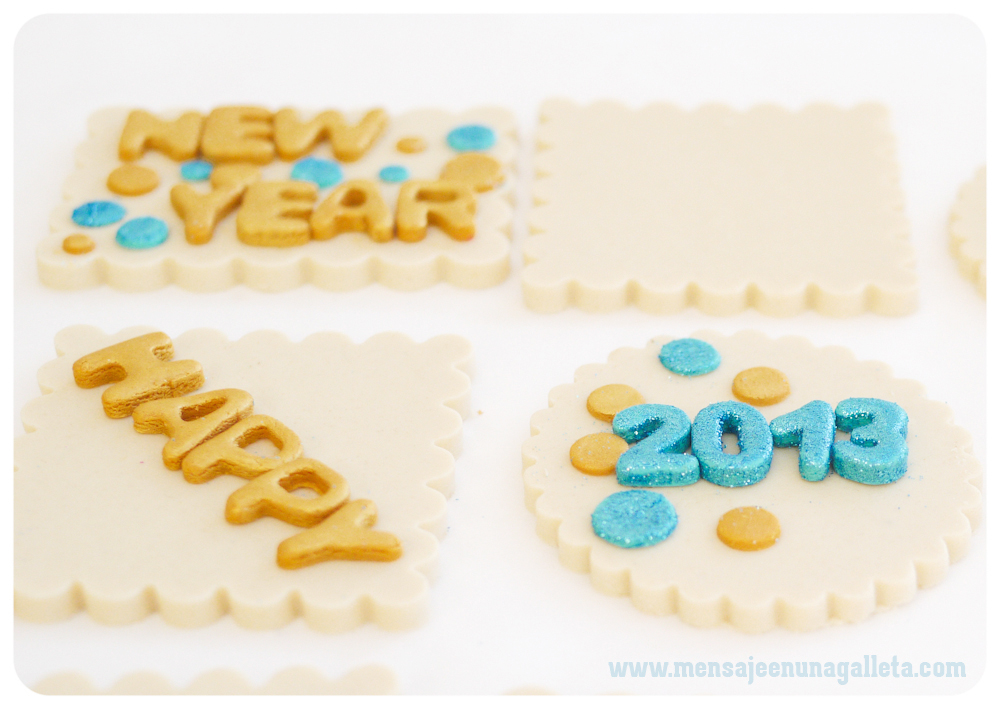
En la red podéis encontrar muchos tutoriales de diferente calidad, que explican cómo aplicarlos sobre glasa o fondant. Yo os voy a contar como utilizarlos directamente sobre masa de galletas.Lo ideal es que la masa de la galleta sea de un tono parecido al del brillo que vamos a utilizar. Así que teñí parte de la masa de azul como explico aquí. Y otra parte de un color ocre que conseguí mezclando muy poco de marrón con mucho de amarillo huevo.Para aplicar los brillos tenemos que acariciar la galleta con suavidad. Como esto lo hacemos con los dedos y parece que no queda muy bonito meterlos dentro de bote, echamos un poco en un trozo de papel de horno, impregnamos bien el dedo y acariciamos la galleta. Para las brillantinas el proceso es casi el mismo, brillantina al papelito, brillantina al dedo y después en lugar de de caricias golpecitos. Creedme no necesitáis nada más, se pegan.

On the Internet you can find a lot of tutorials of different quality, explaining how to apply them on royal icing or fondant. I am going to tell you how to use them directly on cookie dough.
The ideal is to have a dough in a similar shade of the dust we want to apply. I dyed part of my dough blue as I explain here. And another bit I dyed it ochre mixing a little bit of brown with a lot of egg yellow colour.
To apply the Luster Dust we have to softly caress the cookie. As we do this with our fingers and it does not seem right to stick them in the container, we spread a bit of dust on a sheet of kitchen wax paper, coat a finger properly and then caress the cookie. For the Disco Lust the process is almost the same, spread it on the paper, coat the finger but instead of caressing the cookie, we will go for little taps. Believe me, you will not need anything else, dust will stick to the cookie.

Sí os fijáis, los laterales de las galletas también brillan.
Después sólo tenemos que colocar las galletitas encima de las galletas y al horno. No hace falta ponerles nada a modo de pegamento, en el horno se unirán con el calor.
La brillantina, como todas las madres sabemos, sea del tipo que sea, tiende a ocuparlo todo, así que cuando vayáis a colocar las galletitas que la llevan os recomiendo que lo hagáis con muchísimo cuidado.

If you notice, the sides of the cookies are also shiny.
Afterwards we will just have to place the tiny cookies on top of the cookies and bake them. No glue will be necessary, in the oven they will stick to each other with the heat.
Glitter, whatever type it is, as we all (as mothers) know, tends to cover everything, so I heartily recommend you to place the tiny cookies with extreme care.

¡Feliz 2013!

Happy 2013!

Un beso gordo, Miriam G.

A big fat kiss, Miriam G.

P.S.: once again… thank you Gloria!