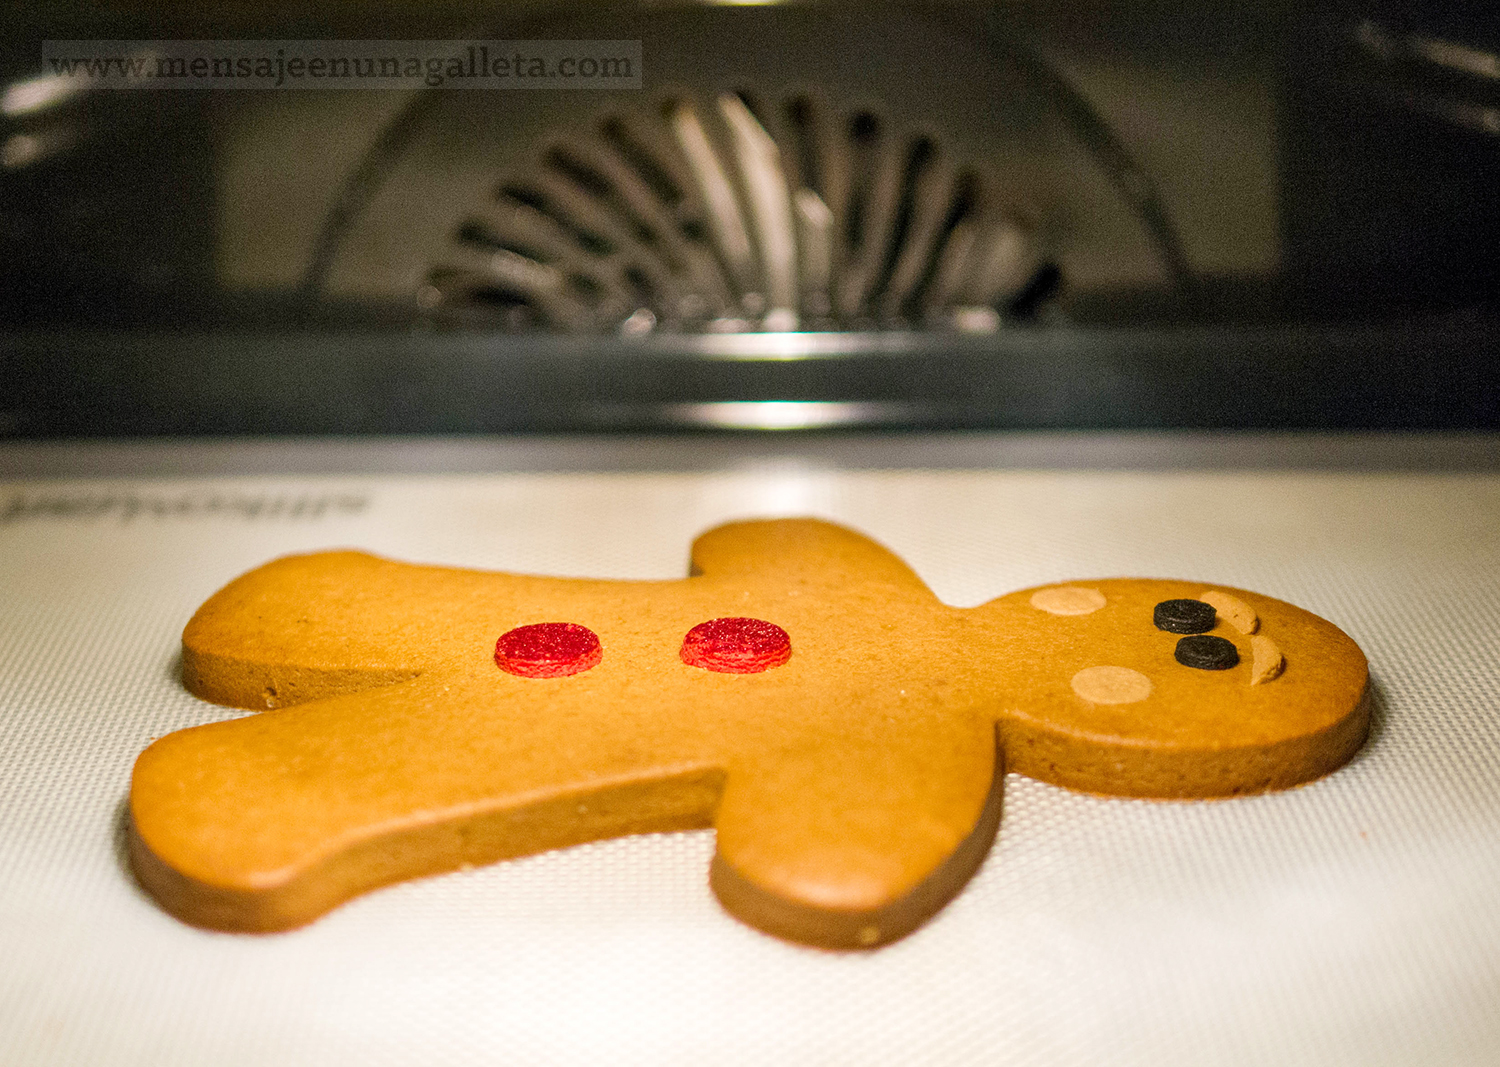
A la pregunta ¿Existe un cortador de hombrecillo de jengibre tan grande? La respuesta es sí, lo venden Alemania, y una buena amiga me lo ha mandado, ¡gracias Lola! Es estupendo.
El gusto español, y por gusto me refiero al sentido, es delicado. Al español medio, una cantidad moderada de picante le pica una barbaridad, y una cantidad razonable lo lleva a urgencias. Lo mismo ocurre con las especias, si lleva alguna, ya lleva muchas, y si lleva muchas solo por el olor rechaza el plato. No es mi caso, mastico los chiles, y abuso de las especias cuando cocino, pese a esto, las galletas de jengibre me gustan suaves, quizá porque el jengibre no me gusta nada. He estado a punto de no echarle, pero me pareció complicado “vender” la receta definitiva de galletas de jengibre, sin jengibre. Pero no importa, si te gusta con mucho jengibre échale más, o si quieres añádale cayena, yo no le puse por las niñas, cambiará el sabor, pero no la textura, ni facilidad con la que se corta y se trabaja con esta masa.
Ingredientes:
– 100 gramos de azúcar moscabado, lo sé, me he enamorado, se lo pongo a todo. Pero si no tienes puedes ponerle azúcar moreno, cuanto menos refinado mejor.
– 75 gramos de miel de caña. Yo he usado una malagueña facilísima de encontrar, al menos aquí.
– 200 gramos de mantequilla a temperatura ambiente.
– 1 huevo pequeño.
– 400 gramos de harina, más la que admita.
– 1 cucharadita de nuez moscada en polvo.
– 1 cucharadita de jengibre en polvo.
– 1 cucharadita y media de pimienta rosa (o una de pimienta negra).
– 2 cucharaditas de canela.
Preparación:
Ponemos en la thermomix o en un molinillo el azúcar y las especias, bolitas de pimienta rosa incluidas, y molemos hasta obtener un polvo fino. Añadimos la mantequilla y mezclamos bien. Añadimos el miel de caña y el huevo y batimos hasta tener una pasta uniforme, añadimos los 400 gramos de harina en dos veces y mezclamos muy bien. Ponemos la masa sobre un tapete enharinado y vamos añadiendo poco a poco la harina que nos pida, cuando no nos pida más amasamos un poco y aplanamos con la mano hasta obtener una altura que sea más o menos el doble de la que queramos para las galletas, enfriamos un rato en el frigorífico y estiramos. Estirar la masa fría nos garantiza una superficie lisa. Volvemos a enfriar y cortamos y horneamos.
Truco para hornear megagalletas: Hornear 10 minutos a 180 grados o hasta que la masa se vuelva mate, bajar la temperatura a 150 grados y hornear otro buen rato, 15 minutos en mi caso. Apagar el horno y dejar la galleta dentro todo lo que podamos.
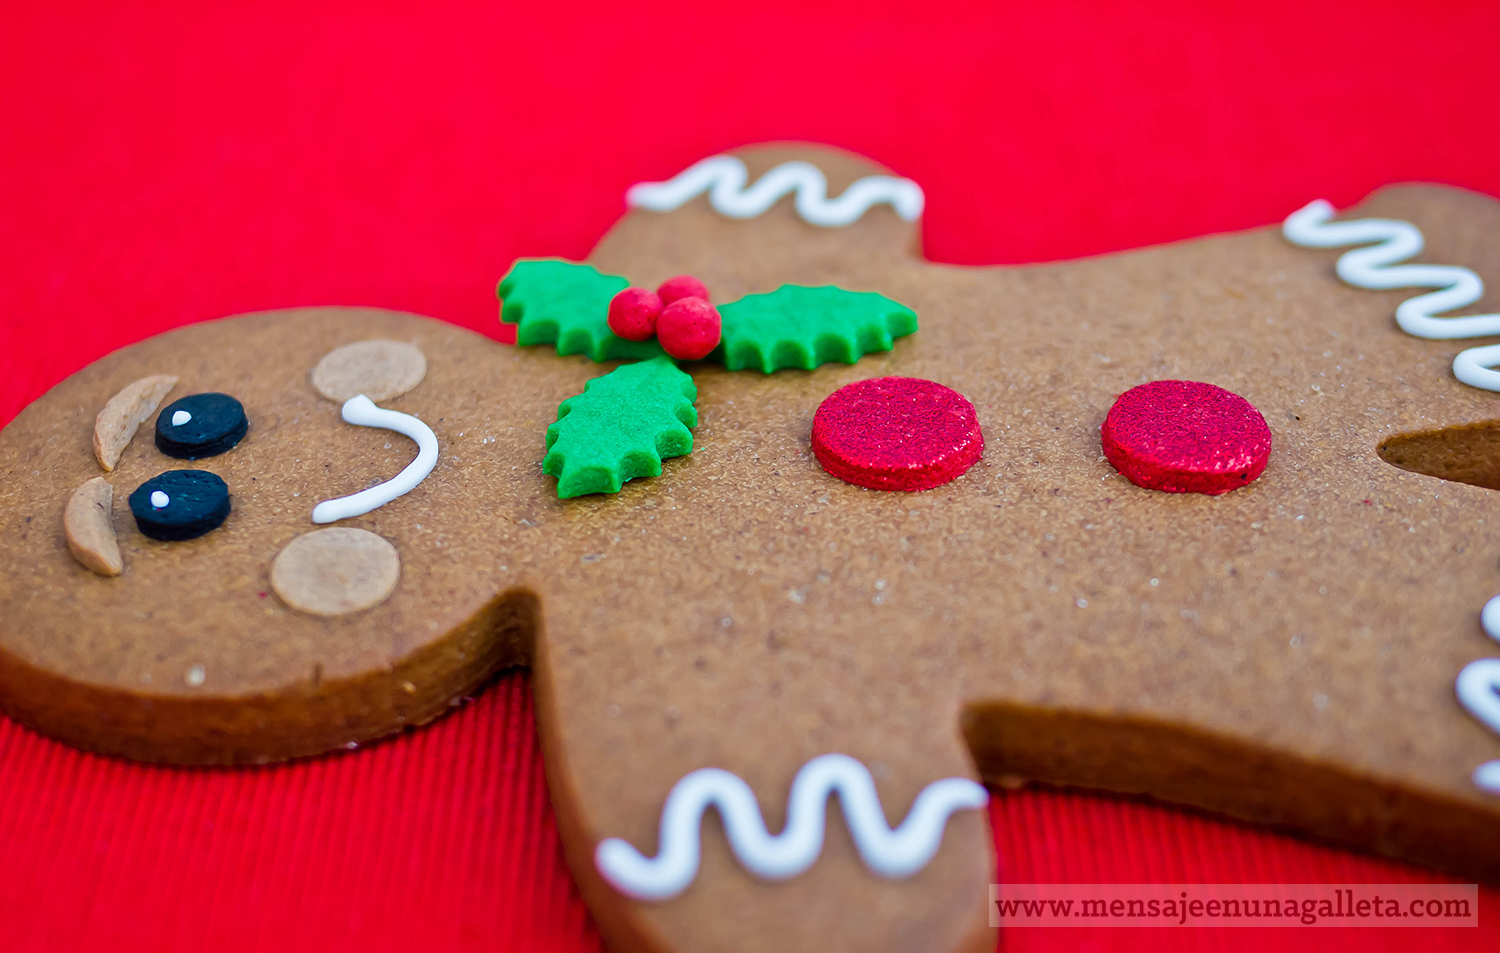
Y ahora vamos con la decoración. Lo blanco es glasa, todo lo demás es masa. Y casi toda la masa de decoración va al horno junto con el hombre de jengibre porque así se pega:
– Los ojos son de masa de chocolate coloreada de negro, la preferida de mis hijas, se los arrancaron y se los comieron lo primero
– Cejas son de masa de jengibre con un pelín de colorante blanco.
– Coloretes, de masa de jengibre también, muy muy finos, de menos de 1 mm. Os cuento cómo lo hago, cojo el rodillo blanco de fondant sin ninguna anilla, estiro la masa finísima y marco el círculo, enfrío y, muy frío, saco el círculo y lo coloco sobre el muñeco. Nota, tengo las manos heladas, eso ayuda.
– Botones, son de masa de vainilla roja, con purpurina. Y sí, la purpurina se puede hornear. Se estira la masa roja y se extiende sobre ella purpurina roja, después se corta.
Transfer de masa pegado con glasa al muñeco:
– Acebo, masa de vainilla coloreada. Las hojas las he cortado con un cortador con expulsor. No existe esa cosa… ¿Cómo se llama? ¿Cortadores de fondant? Solo es que algunas galletas son grandes y otras más pequeñas. Las bolitas rojas también son de masa, si las horneas juntas se pegan.
Y por fin la glasa, para boca, brazos, piernas y pupilas.
Por favor, cuando probéis la receta contadme qué os ha parecido.
Un beso, Miriam G.
(¡Muchísimas gracias Gloria!)
The question: is there a gingerbread man cookie cutter that big? The answer is yes, they sell it in Germany, and a good friend has sent it to me. Thanks Lola! It’s great!
Spanish taste, and by taste I mean the sense, is delicate. For the average Spaniard, a moderate amount of spice tastes super spicy, and a reasonable amount of it, takes him to the E.R. immediately. The same happens with spices themselves, if you add some, they seem to be too many, and if you add a lot of them, just the smell makes you reject the dish. It’s not my case, I chew chili peppers, and I abuse them when I cook. In spite of this, I like my gingerbread cookies to have a delicate flavor, maybe because I do not like ginger at all. I have been about not to use it, but then it would have been complicated to ‘sell’ the definitive gingerbread cookies recipe without any ginger at all. It doesn’t matter, if you like ginger, add more, or add some cayenne if you prefer; I didn’t use it because my girls don’t like it, it will change the flavor a bit, but not the texture, and the dough will be equally easy to cut and work with.
Ingredients:
– 100 grams of muscovado sugar; I know, I’m in love with it, I use it in every recipe, but if you don’t have it, you can use brown sugar, the less refined the better.
– 75 grams of cane honey. I’ve used a local brand, very easy to find in this area.
– 200 grams of butter, room temperature.
– 1 egg (S)
– 400 grams of flour, plus whatever amount it needs.
– 1 tsp. of powdered nutmeg
– 1 tsp. of powdered ginger.
– 1 ½ of pink pepper (or 1 tsp of black pepper).
– 2 tsp. of cinnamon
Elaboration:
In the Thermomix or in any other robot we grind the sugar and the spices, pink pepper seeds included, until we get a fine powder. Then we add the butter and beat well. Add the cane sugar and the egg and beat until obtain a uniform dough. Incorporate the 400 grams of flour in two batches and mix very well. Put the dough on a floured surface and little by little start adding all the flour it needs; when it asks for more, we knead a bit and flatten the dough until we get a height that is more or less double the one we want for our cookies. Let it cool in the fridge and roll out. When we roll it out cold, this guarantees us a complete smooth surface. We put it back in the fridge and after a while we cut it and bake it.
A trick to bake huge cookies: bake them for 10 minutes, 180ºC or until the dough gets matt, then lower the temperature to 150ºC and bake for another 10 minutes, 15 in my case. Turn off the oven and let the cookies inside for as long as you can
Let’s go with the decoration. The white you see on the cookie is royal icing, the rest is dough. And most of the dough used as decoration goes into the oven with the gingerbread man, as that’s the way it sticks to the cookie:
– The eyes are made with chocolate dough dyed in black, my daughters’ favorite, that’s why they plucked them out and ate them first.
– The eyebrows are made with gingerbread dough with a bit of white food coloring.
– Blush: very thin gingerbread dough, less than 1mm. I tell you how I make it: I take the white rolling pin that you use with fondant, and without any of the leveling rings I roll out the dough extremely thin, mark the circle, cool the dough, and when it is very cold I take the circle out of the dough and put it on the gingerbread man. Note: my hands are very cold, that helps.
– Buttons are made of red vanilla dough, with some glitter. Yes, glitter can be baked. You roll out the red dough, put the glitter on it and then cut it.
Dough transfer glued to the cookie using royal icing:
– Holly leaves are made with colored vanilla dough. Leaves have been cut using a plunger cutter. That thing…how do you call it? Fondant cutters? They do not exist. It’s just that some cookies are big and others are small. The small red balls are also made from dough. If you baked them together, they will glue to each other.
And finally, some royal icing for the mouth, arms, legs and pupils.
When you try this recipe, please let me know what you thinUn beso, Miriam G.k.
A big kiss, Miriam G.
( Thanks Gloria!)
